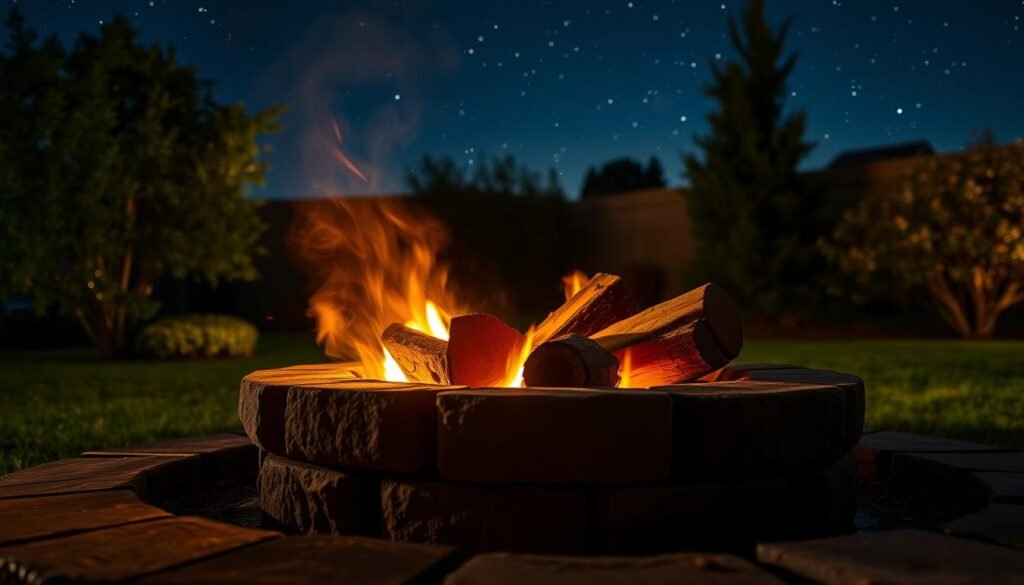
There’s something magical about gathering around a warm, crackling fire. It’s a timeless tradition that brings people closer, creating memories that last a lifetime. Whether it’s roasting marshmallows with the kids or sharing stories with friends, a fire pit transforms your backyard into a cozy retreat.
Creating your own outdoor gathering spot doesn’t have to be complicated. With a few simple materials and a bit of effort, you can craft a beautiful fire pit that enhances both the look and functionality of your space. This guide is designed for beginners, making it easy to complete in just a few hours.
From planning to safety and maintenance, we’ll walk you through every step. By the end, you’ll have a stunning centerpiece that invites warmth, laughter, and connection to your backyard.
Key Takeaways
- A fire pit creates a cozy gathering spot for family and friends.
- This DIY project is beginner-friendly and can be completed in a few hours.
- It enhances both the aesthetics and functionality of your outdoor space.
- Proper planning ensures safety and long-term enjoyment.
- Regular maintenance keeps your fire pit in great condition.
Planning Your DIY Fire Pit Project
Creating a cozy outdoor gathering spot starts with thoughtful planning. Before diving into the project, take time to assess your backyard space and define your goals. Whether you want a warm spot for family nights or a stylish feature for entertaining, a clear vision ensures success.
Defining Your Backyard Space and Objectives
Start by measuring your available area. Consider the size of your pit and its placement. Make sure it’s far enough from structures and trees for safety. Think about how you’ll use the space—will it be for small gatherings or larger events? Defining these details early helps avoid mistakes later.
Budget Considerations and Project Timeline
Set a realistic budget based on your materials and design. Simple projects can cost as little as $25, while more elaborate designs may reach $450. Plan your timeline, too. Most DIY builds take a few hours to a weekend, depending on complexity. Make sure every detail is considered before starting construction.
Selecting the Perfect Location and Layout
Choosing the right spot for your outdoor feature is the first step to success. The location impacts safety, functionality, and overall enjoyment. A well-placed gathering space enhances your backyard while minimizing risks.
Safety Guidelines and Distance from Structures
Safety is paramount when deciding where to place your feature. Keep it at least 10 feet away from buildings, trees, and other structures. This reduces the risk of accidents and ensures compliance with most safety standards.
Consider wind direction and open space. Avoid areas with low-hanging branches or flammable materials. A clear, level surface is ideal for stability and accessibility.
Consulting Local Building Codes and HOA Rules
Before starting, check local building codes and HOA guidelines. Some areas have specific rules about size, depth, and placement. Make sure your project meets all requirements to avoid fines or delays.
Consulting these rules early saves time and ensures your feature is both safe and legal. It’s a small step that makes a big difference in the long run.
Step-by-Step Guide: How to Build a Fire Pit
Crafting a durable and visually appealing outdoor feature requires precision and attention to detail. Follow these steps to create a stable and professional-looking structure.
Start by gathering all necessary materials. Arrange your blocks, gravel, and tools in the designated area. This preparation ensures a smooth workflow and minimizes interruptions.
Begin with the first layer of blocks. Place them in a circular or square pattern, depending on your design. Use a level to ensure the first layer is perfectly flat. This step is crucial for the stability of the entire structure.
Once the first layer is set, stack the second layer of blocks. Align each block carefully to maintain balance and symmetry. Repeat this process for additional layers, checking the level after each one.
Here are some tips for achieving a professional finish:
- Use a rubber mallet to adjust blocks without damaging them.
- Double-check the alignment of each layer before proceeding.
- Ensure the base is stable by compacting the gravel thoroughly.
Each block and layer plays a critical role in the final outcome. Proper alignment and a solid foundation ensure your structure is both functional and visually appealing.
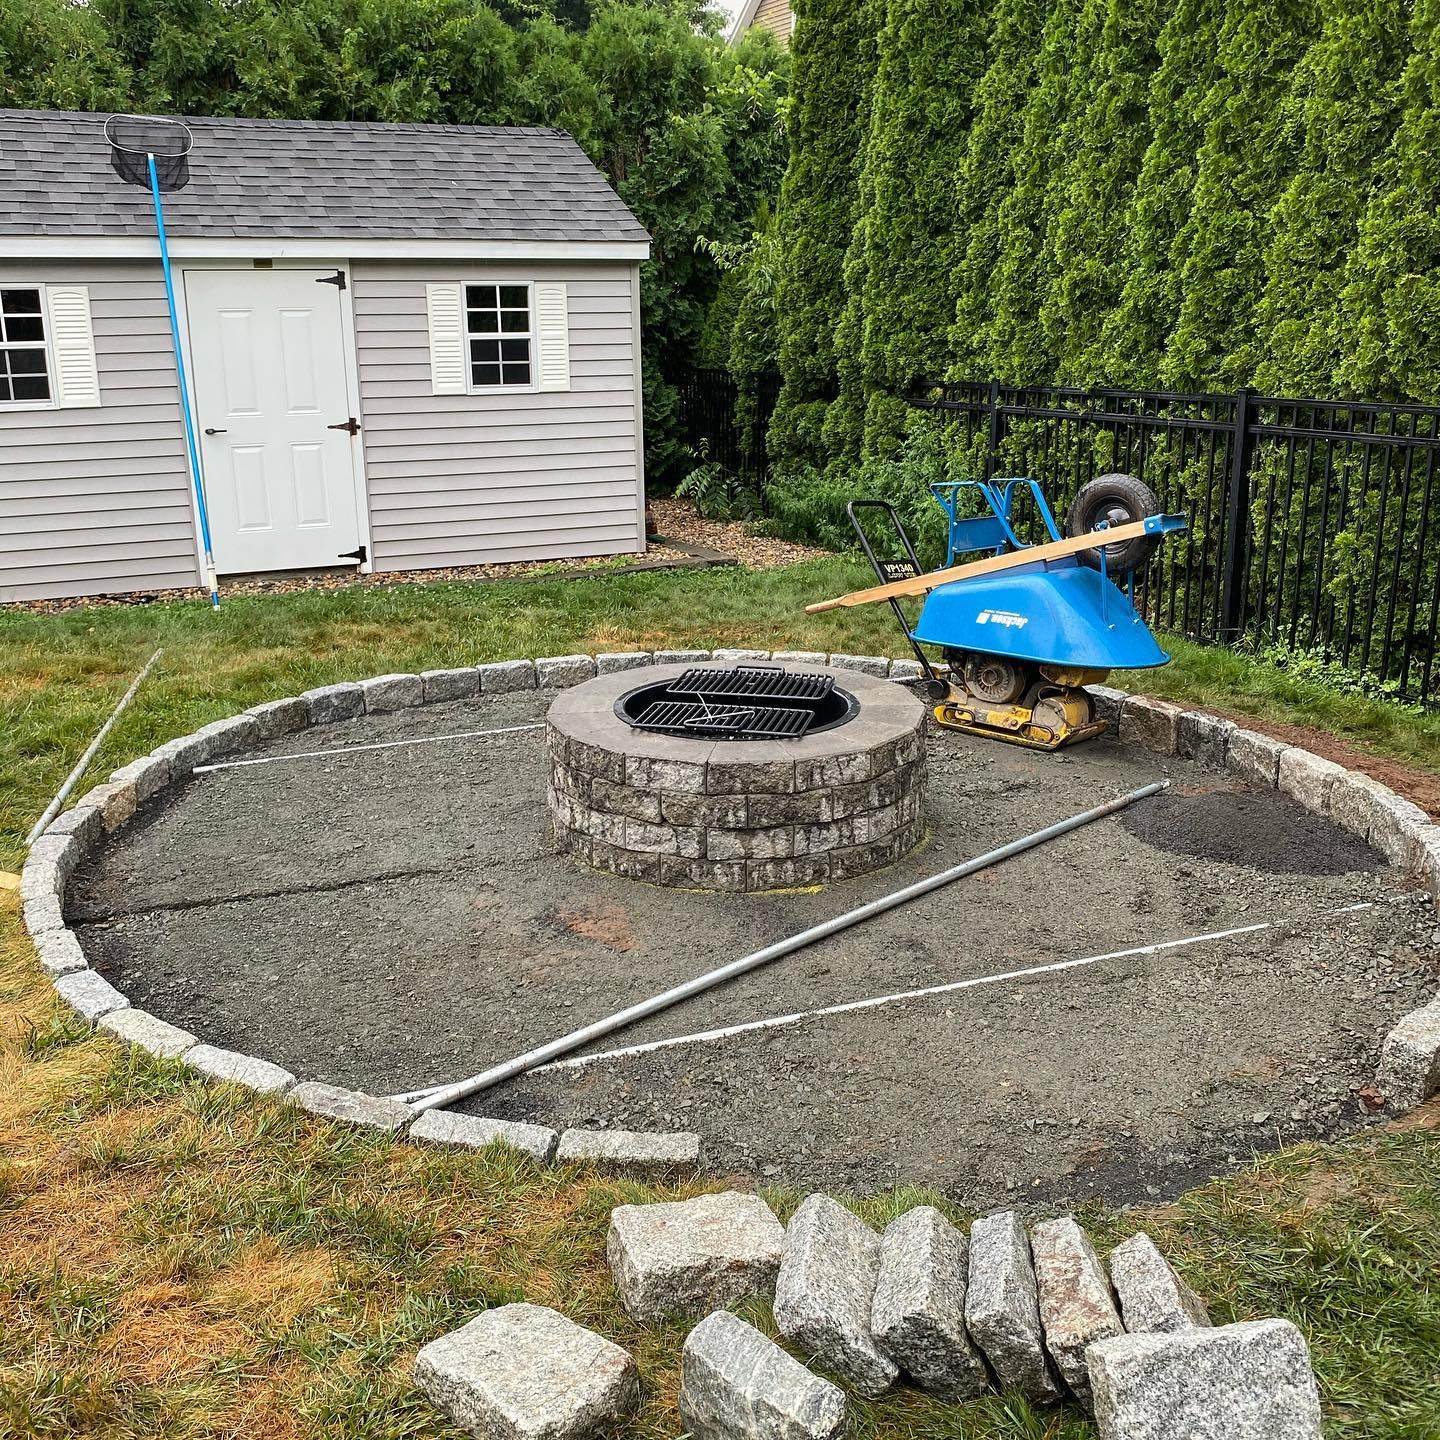
Preparing and Marking the Fire Pit Site
A well-prepared site ensures your outdoor feature stands the test of time. Properly measuring and marking the area is the first step to creating a functional and visually appealing gathering spot. Taking the time to do this right saves effort later.

Measuring, Marking, and Outlining Your Fire Pit Area
Start by measuring your designated backyard space. Use stakes and string to outline the shape of your feature. For a circular design, drive a stake into the center and tie a string to it. Pull the string taut and walk in a circle, marking the perimeter with spray paint.
This technique ensures accuracy and helps visualize the final look. Take your time to adjust the outline until it’s perfect. A well-marked area makes the next steps easier.
Once the outline is complete, prepare the ground. Clear any sod or debris from the marked area. Dig a hole to the recommended depth, usually between 8 and 12 inches. This ensures a stable base for your structure.
Here are some tips for this process:
- Use a measuring tape to confirm the area dimensions.
- Double-check the alignment of stakes and string for precision.
- Clear the ground thoroughly to avoid uneven surfaces.
Accurate measurements and a clean area are essential for a professional finish. These initial steps set the foundation for a durable and attractive feature in your backyard.
Building a Stable Base with Gravel and Leveling
A strong foundation is the key to a durable and safe outdoor gathering spot. Every step in this process ensures your structure remains stable and functional for years to come. Start by focusing on the base, as it supports the entire project.
Excavating the Area and Ensuring a Level Ground
Begin by digging a hole in the designated area. The recommended depth is around 7 inches, which provides enough space for the gravel base. Use a shovel to remove the soil evenly, ensuring the hole is level from all sides.
Check the depth with a measuring tape as you go. A level base is crucial for the stability of your structure. If the ground is uneven, adjust the soil until it’s flat. This step prevents future issues like tilting or shifting.
Compacting Dirt and Spreading Crushed Gravel
Once the hole is dug, compact the dirt using a tamper. This ensures the ground is firm and ready for the gravel layer. Spread crushed gravel evenly over the area, aiming for a thickness of about 5 inches.
Use a rake to distribute the gravel uniformly. This step creates a solid foundation that supports the weight of the structure. Double-check the level with a spirit level to ensure accuracy.
Here are some practical ideas to enhance this process:
- Compact the dirt in layers for better stability.
- Use a wheelbarrow to transport gravel efficiently.
- Measure the gravel depth periodically to maintain consistency.
Taking the time to complete these steps ensures your outdoor feature is both safe and long-lasting. A well-prepared base is the foundation of a successful home improvement project.
Arranging and Laying Fire Pit Blocks
Arranging blocks for your outdoor feature is both an art and a science. The process requires precision, patience, and a methodical approach to ensure stability and aesthetics. Whether you’re working in a garden or a backyard, the right techniques make all the difference.
Layer-by-Layer Block Placement Techniques
Start by placing the first layer of blocks in a circular or square pattern. Use a level to ensure the top of each block is perfectly flat. This step is crucial for the stability of the entire structure.
Stack the second layer, ensuring each block overlaps the one below. This overlapping edge enhances stability and creates a professional finish. Repeat this process for additional layers, checking the alignment after each one.
Here are some tips for success:
- Use a rubber mallet to adjust blocks without damaging them.
- Double-check the alignment of each layer before proceeding.
- Ensure the base is stable by compacting the gravel thoroughly.
Test-Fitting the Fire Pit Bowl for a Perfect Fit
Before finalizing the block arrangement, test-fit the bowl. Place it in the center of the structure to ensure it fits snugly. Adjust the blocks with a shovel or rubber mallet if needed.
This step ensures the bowl sits securely within the block structure. A proper fit prevents shifting and enhances safety. Take your time to get it right.
“Attention to detail is key,” says one DIY enthusiast. “A well-fitted bowl ensures your outdoor space is both functional and beautiful.”
By following these steps, you’ll create a durable and visually appealing feature for your garden or backyard. The DIY approach ensures you have full control over the final result.
Securing the Fire Pit Structure with Adhesive
Securing your outdoor feature with the right adhesive ensures longevity and safety. The material you choose plays a crucial role in creating a durable and stable structure. A strong bond between layers prevents shifting and enhances the overall integrity of your project.
Choosing the Right Construction Adhesive
Selecting a heat-resistant adhesive is essential. Outdoor conditions, including high temperatures and moisture, require a product designed to withstand these challenges. Look for adhesives specifically labeled for outdoor use and capable of bonding stone or concrete.
Apply the adhesive evenly to the bottom of each block layer. This ensures a secure bond and prevents gaps. Use a caulk gun for precise application, spreading the adhesive about an inch from the ring’s edge. This technique creates a strong foundation for the next layer.
Aligning blocks correctly is equally important. Pay attention to their size and ring formation. Proper alignment ensures stability and a professional finish. Double-check each layer before moving to the next.
Here are some practical tips for success:
- Allow the adhesive to cure completely before use, as per the manufacturer’s instructions.
- Use a rubber mallet to adjust blocks without damaging them.
- Ensure the base is stable by compacting the gravel thoroughly.
Using the right material and techniques guarantees your outdoor feature remains robust and durable. A well-secured structure enhances both safety and aesthetics, making it a lasting addition to your location.
Enhancing Your Fire Pit with Finishing Touches
The final touches on your outdoor feature can transform it from functional to truly stunning. Paying attention to every foot of the structure ensures a professional-grade look that complements your backyard space. Whether you’re aiming for a rustic or modern aesthetic, these steps will help you achieve a polished finish.

Applying Mortar or Adhesive for a Seamless Look
For a smooth and durable finish, apply a final coat of mortar or adhesive between the layers of stone. This step not only enhances stability but also creates a seamless appearance. Use a trowel to spread the mortar evenly, ensuring no gaps are left.
“A well-applied mortar layer is the key to longevity,” says one DIY expert. “It prevents shifting and adds a professional touch.” Allow the mortar to cure for at least 48 hours before use, as recommended by manufacturers.
Sealing, Painting, and Adding Aesthetic Elements
Sealing the stone protects it from weather damage and enhances its natural color. Choose a heat-resistant sealant for best results. If you prefer a custom look, consider painting the exterior with outdoor-safe paint.
Incorporate decorative elements like mosaic tiles or engraved stone to personalize your feature. Leftover gravel can be used to create a border or fill gaps around the base, adding both stability and visual appeal.
Here are some ideas to elevate your design:
- Use polymeric sand to fill joints between pavers for a tight bond.
- Add a metal ring or cap for a polished finish.
- Integrate lighting around the perimeter for nighttime ambiance.
By focusing on these details, you’ll create a feature that’s not only functional but also a beautiful addition to your outdoor space.
Ensuring Fire Pit Safety and Long-Term Maintenance
Maintaining your outdoor gathering spot ensures it remains a safe and inviting space for years to come. Regular care and attention are essential to preserve its functionality and appearance. By following a few simple steps, you can keep your structure in top condition for every season.
Routine Inspections and Cleaning Tips
Regular inspections are crucial to identify signs of wear, such as cracks or rust. Check the base and first layer for stability, ensuring they remain intact. Remove ash and debris after each use to maintain optimal airflow and prevent buildup.
For deeper cleaning, use a mild solution of water and muriatic acid (10:1 ratio) to enhance the appearance of stone or brick. Always dry metal surfaces thoroughly to prevent rust, which can form in as little as 24 hours.
Proper Usage and Preventative Measures
Position your structure at least 10 feet from flammable materials and avoid use during high winds. Keep a water source or fire extinguisher nearby for emergencies. Never use accelerants like gasoline, as they increase the risk of accidents by over 60%.
Seasonal care is also important. Cover your feature with a weather-resistant material to protect it from the elements. Applying a high-heat sealant or paint can extend its lifespan by preventing weather damage.
Here are some practical tips for long-term care:
- Inspect the construction every six months for signs of wear.
- Use seasoned wood to reduce smoke and creosote buildup by up to 50%.
- Store portable features in a dry, covered area during winter.
By following these guidelines, you’ll ensure your outdoor gathering spot remains a safe and beautiful addition to your backyard for years to come.
Conclusion
Transforming your backyard into a cozy retreat is easier than you think. From the initial design to the final aesthetic touches, every part of this project plays a crucial role. Selecting the right paver or brick, aligning each circle with precision, and applying a final coat of paint all contribute to a breathtaking result.
Attention to detail in every layer ensures your outdoor space becomes a stunning centerpiece. With the right instructions and materials, anyone can create an amazing gathering spot. This project not only enhances your backyard but also brings people together for unforgettable moments.
Take the leap and add this feature to your home. With a little effort, you’ll have a warm, inviting retreat that’s perfect for family nights or entertaining friends. Start planning today and enjoy the rewards of your DIY success.
Also Read
- How Does a Smokeless Fire Pit Work
- How to Build a Smokeless Fire Pit
- Create a Tiki Patio Oasis
- Can One Cook on a Smokeless Fire Pit
- How Far Should a Fire Pit Be From Your House?
- Can You Put a Fire Pit on a Deck
- What to Do with Fire Pit Ashes
- Top Fire Pit Uses
- Can One Cook Food on a Propane Fire Pit?
- Guide to Starting a Fire Pit at Home
- How to Use Propane Fire Pits the Best

John Carter is a firepit expert with 10+ years of experience in outdoor heating solutions. He specializes in firepit selection, installation, and maintenance, sharing tips on DIY projects, product reviews, and backyard entertainment. Passionate about creating cozy outdoor spaces, he helps homeowners choose the perfect firepit for their needs