
Ever wondered why some backyards feel like a warm, inviting retreat while others fall flat? The secret often lies in a simple yet transformative addition: a fire pit. Imagine gathering around a cozy flame, sharing stories, and enjoying the outdoors—all without breaking the bank.
Creating your own outdoor centerpiece is easier than you think. With a DIY approach, you can craft a budget-friendly fire pit that suits your space and style. This guide will walk you through every step, from choosing the right materials to ensuring safety and functionality.
Whether you’re a seasoned DIY enthusiast or a beginner, this project is designed to be straightforward and cost-effective. By the end, you’ll have a stunning addition to your backyard that’s perfect for family gatherings or quiet evenings under the stars.
Key Takeaways
- Learn to create a budget-friendly outdoor space with a DIY fire pit.
- Discover essential materials and tools for a seamless project.
- Understand safety tips to keep your gatherings enjoyable and secure.
- Transform your backyard into a cozy retreat with minimal effort.
- Follow step-by-step instructions for a hassle-free experience.
Understanding the Benefits of a DIY Fire Pit
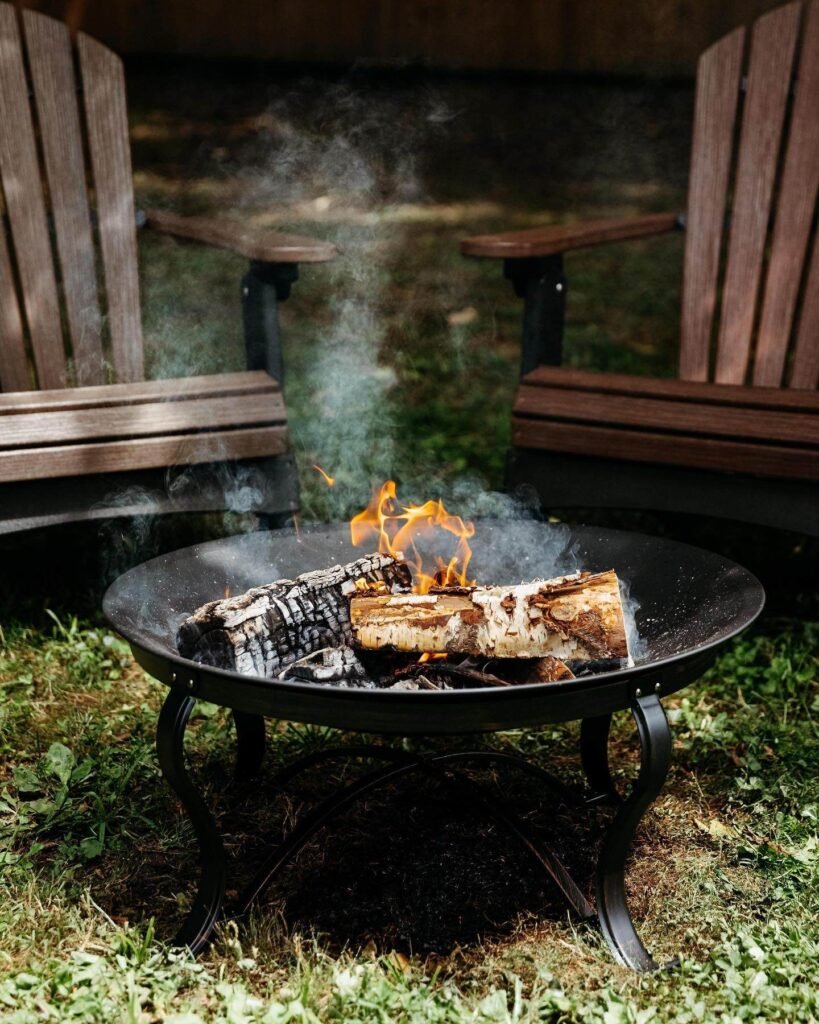
A backyard fire pit can transform your outdoor space into a cozy retreat. It’s more than just a functional addition; it’s a centerpiece that invites warmth, conversation, and relaxation. Whether you’re hosting friends or enjoying a quiet evening, a fire pit enhances your outdoor living experience.
Enhancing Your Backyard Experience
A custom fire pit adds charm and versatility to your yard. Unlike pre-made options, a DIY project allows you to tailor the design to match your style. You can choose materials, shapes, and sizes that complement your outdoor space. This customization not only boosts your property’s appeal but also creates a warm, inviting area for gatherings.
As one homeowner shared,
“Building our fire pit was the best decision for our backyard. It’s become the heart of our outdoor space.”
This sentiment is common among DIY enthusiasts who value the personal touch a custom fire pit brings.
Budget-Friendly Outdoor Living
One of the biggest advantages of a DIY fire pit is the cost savings. By sourcing materials yourself and handling the construction, you can save 30-50% compared to buying a pre-made one. Repurposed materials like bricks or stones can further reduce expenses while adding a unique touch to your design.
Planning is key to maximizing your budget. Consider the size, location, and materials that best suit your needs. A well-thought-out design ensures your fire pit is both functional and stylish, making it a worthwhile investment for your outdoor space.
Planning Your DIY Fire Pit Project
Planning a DIY fire pit project starts with a clear vision and careful preparation. Taking the time to sketch out your design and set a budget ensures a smooth process. This step-by-step approach helps you create a functional and stylish addition to your outdoor space.
Setting Your Budget and Size Requirements
Begin by determining the size and shape of your fire pit. A circle is a popular choice, offering a classic look and even heat distribution. Aim for an interior diameter of 3 to 4½ feet and a depth of about 1 foot for optimal functionality.
Next, consider the place in your yard. Ensure the location is at least 10 feet away from structures or flammable materials. This spacing is crucial for safety and compliance with local codes.
Budgeting is another key aspect. Opt for affordable materials like bricks or stones to keep costs low. A well-planned DIY fire pit project can save you up to 50% compared to pre-made options.
Finally, sketch a layout that integrates the fire pit into your outdoor area. Think about seating arrangements and how the design complements your space. With thoughtful planning, your DIY fire pit will become a cozy centerpiece for gatherings.
Selecting Affordable, Heat-Resistant Materials
Choosing the right materials is the foundation of a durable and safe fire pit. Heat-resistant options ensure your project withstands high temperatures while maintaining its structural integrity. This step is crucial for both functionality and safety.
Fire Bricks, Retaining Wall Blocks, and Paver Base
For the interior, fire bricks are a must. Unlike regular bricks, they are designed to handle extreme heat without cracking. Regular bricks may crumble under high temperatures, posing a safety risk. Fire bricks are a reliable choice for longevity.
The exterior benefits from retaining wall blocks. These blocks provide stability and a polished look. They are also affordable and widely available, making them a practical option for your project.
Don’t overlook the paver base. This layer ensures stability and proper drainage. A well-prepared base prevents shifting and extends the life of your fire pit. Gravel or sand can be used to create this essential foundation.
Selecting the right materials not only protects against heat damage but also ensures compliance with local building codes. Repurposed items like salvaged bricks can add a unique touch while keeping costs low. With careful planning, you can create a budget-friendly and safe outdoor centerpiece.
Gathering Essential Tools and Equipment
The right tools can make or break your DIY project. Before diving into the construction of your outdoor centerpiece, it’s crucial to gather all the necessary equipment. This ensures a smooth process and a stable, long-lasting structure.
Start with basic garden tools like a shovel, garden rake, and sod lifter. These are essential for preparing the ground and managing smaller tasks. For heavier lifting, a wheelbarrow comes in handy to transport materials like gravel or bricks.
Power tools like a circular saw with a concrete blade are vital for cutting materials to size. Pair this with saw horses for stability during cutting. A hand tamper and level ensure the base is even and secure, which is critical for the structure’s stability.
Safety should always be a priority. Make sure you have work gloves, eye protection, and a dust mask to protect yourself during the process. Hearing protection is also recommended when using loud tools like a circular saw.
Many of these tools might already be available at home, saving you time and money. For added convenience, consider using clamps and a speed square for precise measurements and alignment. An optional shop vacuum can help keep your workspace clean.
Here’s a quick checklist to ensure you’re fully prepared:
- Sod lifter, shovel, and garden rake
- Wheelbarrow for material transport
- Circular saw with concrete blade and saw horses
- Hand tamper, tape measure, and level
- Speed square, clamps, and optional shop vacuum
- Safety gear: work gloves, eye protection, hearing protection, dust mask
With the right tools in hand, your DIY project will be both efficient and enjoyable. Proper preparation ensures a safe and successful outcome, turning your backyard into a cozy retreat.
Step-by-Step: how to build cheap fire pit

Transforming your backyard into a warm gathering spot is easier than you think. With a clear plan and the right materials, you can create a durable and stylish outdoor feature. This guide will walk you through the essential steps to ensure your project is both fun and functional.
Overview of the Construction Process
Start by marking the layout of your fire pit. Use a tape measure and stakes to outline the desired shape and size. This step ensures accuracy and helps you visualize the final product. Once the layout is set, dig the foundation to the recommended depth of 6 to 12 inches.
Time management is crucial. Allocate an hour for each major task, such as preparing the base and stacking materials. This approach keeps the project on track and prevents burnout. A well-planned schedule ensures a smooth and enjoyable experience.
When placing the blocks, use construction adhesive to bond the layers securely. Apply the adhesive evenly to create a stable structure. Allow at least 24 hours for the adhesive to cure completely. This waiting period is essential for safety and durability.
Practical tips can make the process easier. Use a shop vacuum to manage dust and keep your workspace clean. Test the foundation for stability before proceeding to the next step. A uniform build ensures a sturdy and long-lasting fire pit.
Patience is key during the curing time. Rushing this step can compromise the structure’s integrity. Following these steps guarantees a successful DIY project that transforms your backyard into a cozy retreat.
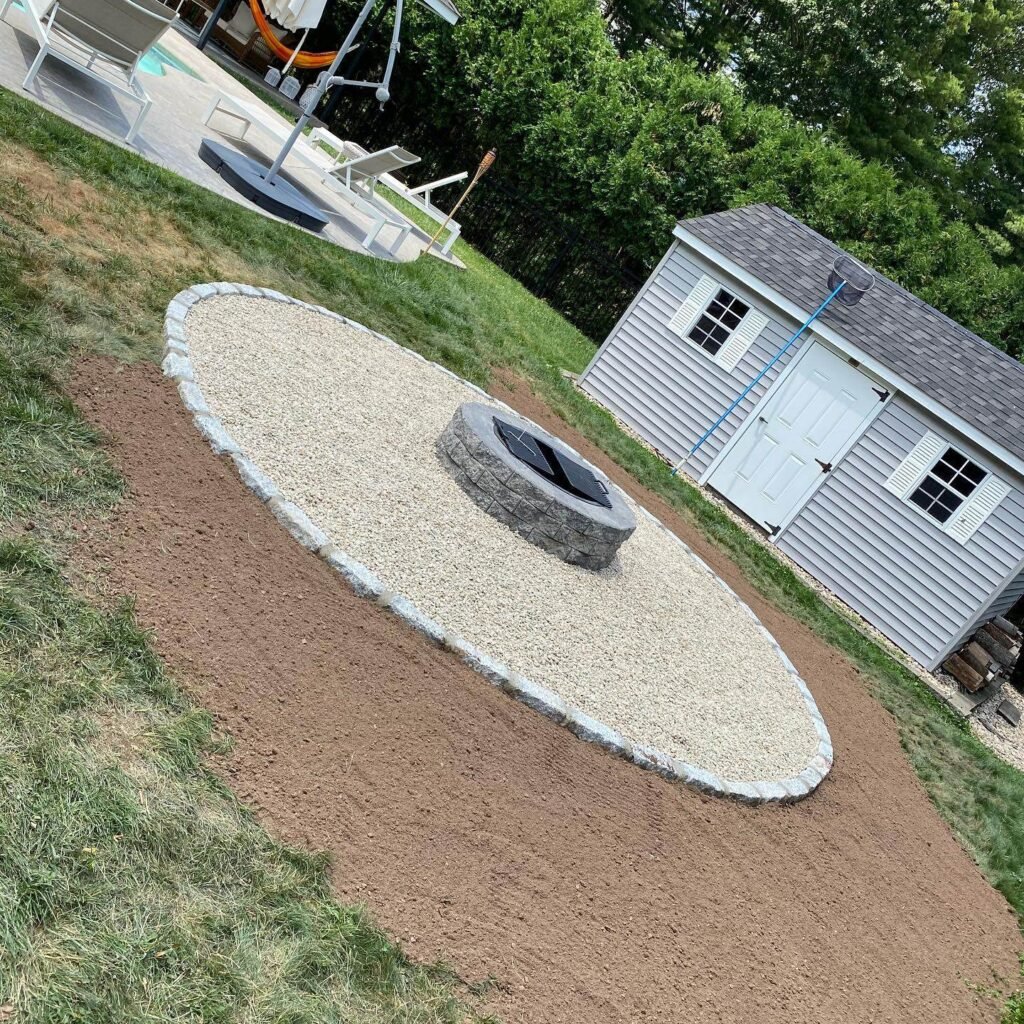
Laying Out the Fire Pit Foundation and Base
A solid foundation is the backbone of any successful outdoor project. For your fire pit, this means creating a stable base that ensures safety and durability. Proper preparation is key to achieving a long-lasting structure.

Creating a Stable Paver Base
Start by clearing the area where your fire pit will sit. Remove any sod or grass to create a clean surface. This step ensures the base is even and free from organic material that could shift over time.
Next, spread a layer of gravel across the cleared area. Gravel provides drainage and prevents water from pooling under your fire pit. Wet the gravel lightly and use a hand tamper to compact it. This creates a firm base that supports the weight of the structure.
Measuring and Leveling Your Pit
Once the gravel is in place, it’s time to measure and level the bottom layer. Use a long level and a mallet to ensure the surface is flat. A level base is crucial for the stability of your fire pit and prevents uneven settling.
Check the area periodically during installation. If needed, add extra paver material to achieve a flat finish. Accuracy in this step ensures the overall stability of your project. Work methodically to create a durable foundation that will stand the test of time.
Stacking Blocks and Forming the Fire Pit Walls
The way you stack blocks determines the strength and style of your fire pit. Start by arranging the first layer in a tight circle. This creates the foundation for the wall and ensures stability. Use a garden mallet to gently tap each block into place, ensuring they sit evenly.
Stagger the joints between blocks for added structural integrity. This technique prevents weak points and makes the wall more durable. Apply construction adhesive between layers to bond the blocks securely. This step is crucial for maintaining stability, especially when the fire pit is in use.
Check each block’s alignment as you stack. A level ensures the structure remains even and prevents uneven settling. Take your time to ensure every layer is straight and secure. This attention to detail enhances both safety and the final look of your fire pit.
Incorporate a ring element into the design for visual appeal. This can be achieved by using curved blocks or arranging pavers in a circular pattern. The result is a cohesive and attractive addition to your outdoor space.
Finally, ensure the assembled structure is level before adding more layers. A sturdy wall is essential for containing the fire safely. With careful stacking and proper adhesive application, your DIY fire pit will be both functional and stylish.
Installing Fire Bricks for the Interior Finish
The interior finish of your fire pit plays a crucial role in its durability and safety. Fire bricks are essential for lining the inside, as they withstand extreme heat without cracking. This step ensures your structure remains intact and safe for use.
Cutting and Positioning Fire Bricks
Start by measuring the circle of your fire pit to determine the number of bricks needed. Use a circular saw with a concrete blade or a chisel and hammer to cut the bricks to size. Precision is key to ensuring a snug fit.
Arrange the bricks along the interior, ensuring they align tightly. Stagger the joints for added stability. This technique prevents weak spots and enhances the overall structure. Use a level to verify even placement, which is crucial for both safety and appearance.
Protect the bottom fire pit by placing a layer of fire bricks flat on the base. This layer shields the foundation from direct heat, extending the life of your project. A neat installation not only improves heat resistance but also enhances the look of the retaining wall.
Safety is paramount when handling and cutting bricks. Wear protective gear, including gloves and eye protection, to prevent injuries. A careful installation ensures your fire pit is both functional and visually appealing.
Applying Construction Adhesive and Finishing Touches
The final steps of your fire pit project bring both durability and style to your outdoor space. Applying construction adhesive is essential for locking the blocks in place. Use a liberal amount between each layer to ensure a stable structure.
When securing the top layer, make sure it’s level and firmly bonded. This step prevents shifting and enhances the overall design. Allow the adhesive to cure completely, following the manufacturer’s instructions. Patience here ensures a long-lasting project.
Adding finishing touches can elevate the idea of your fire pit. Consider decorative lava rocks or a fire pit ring to contain the flame. These elements not only improve functionality but also add a polished look.
Clean off any excess adhesive for a professional finish. This attention to detail ensures your fire pit is both safe and visually appealing. Finally, test the structure’s stability before lighting a fire.
These steps are crucial for creating a durable and inviting space around fire. With careful finishing, your fire pit will become a centerpiece for gatherings and relaxation.
Safety Considerations and Local Regulations
Safety is the cornerstone of any outdoor project, especially when dealing with open flames. A backyard fire pit can be a wonderful addition, but it’s crucial to prioritize safety and follow local guidelines. Proper planning ensures your project is both enjoyable and secure.
Maintaining Safe Distances and Fire Code Compliance
Start by selecting the right location for your fire pit. Keep it at least 10 feet away from structures, trees, and other flammable materials. This spacing minimizes risks and complies with most local fire codes. Always check your area’s specific regulations before starting.
Calling 811 before digging is a must. This free service helps identify underground utilities, preventing accidents and costly repairs. It’s a simple step that ensures your project starts on the right foot.
The size and place of your fire pit also impact safety. Avoid areas with overhanging branches or dry vegetation. A pit ring can help contain the flames, adding an extra layer of protection.
Always keep safety equipment nearby, such as a fire extinguisher or bucket of sand. These tools are essential for handling unexpected situations. Regular inspections and adherence to local ordinances ensure your fire pit remains a safe and enjoyable feature.
Innovative DIY Fire Pit Design Ideas
Adding a personal touch to your outdoor space can make it truly unique. With a little creativity, you can transform everyday items into stunning fire pit designs. Repurposing materials not only saves money but also adds character to your backyard.
Incorporating Repurposed Materials for Unique Looks
Old planters, wheelbarrows, or even stainless-steel drums can become the centerpiece of your yard. These items offer a modern rustic look that’s both functional and stylish. For example, an old planter can be lined with stone to create a charming fire pit.
Using patio elements like pavers or bricks can elevate the design. These materials are durable and blend seamlessly with outdoor spaces. Combining traditional and modern elements gives your diy fire pit a unique flair.
Sources like The Interior Frugalista and A Beautiful Mess offer great inspiration. They showcase how repurposed items can be transformed into functional art. Always ensure the materials used are fire-safe to maintain safety.
Blending the fire pit into your existing yard is key. Consider the layout and how it complements your outdoor living area. A well-designed fire pit becomes a natural extension of your space.
Encourage creativity while keeping practicality in mind. These ideas not only personalize your backyard but also enhance its overall appeal. With the right approach, your diy fire pit will be a standout feature.
Maximizing Budget: Affordable Material and Tool Tips
Creating a stunning outdoor feature doesn’t have to drain your wallet. With a bit of creativity and smart planning, you can save significantly on your diy fire pit project. Start by exploring repurposed materials like old bricks or stones. These can add a unique touch while cutting costs by up to 30%.
Opt for retaining wall blocks or pavers as affordable alternatives. These materials are durable, widely available, and perfect for creating a sturdy base. Discount sourcing from local suppliers or salvage yards can further reduce expenses. Always check for sales or bulk deals to maximize savings.
When it comes to tools, use what you already have in your garden. Basic items like a shovel, level, and mallet are often enough for simple projects. If you need to purchase tools, consider borrowing or renting to avoid unnecessary expenses.
Construction adhesive is a cost-effective way to secure blocks without professional help. Apply it carefully between layers to ensure stability. This approach not only saves money but also gives you full control over the project.
Planning is key to staying within budget. Sketch out your design and calculate the exact amount of material needed. Avoid overbuying by measuring twice and purchasing only what’s necessary. A well-organized plan ensures you don’t waste resources.
Finally, think outside the box. Repurpose household items like old planters or metal drums for a creative twist. These ideas not only save money but also add personality to your outdoor space. With careful planning and resourcefulness, you can create a beautiful fire pit without breaking the bank.
Conclusion
Creating a cozy gathering spot in your yard is easier than you might think. With the right design and materials, your backyard can become the perfect place for relaxation and fun. This diy project not only saves money but also adds a personal touch to your outdoor space.
From selecting the right circle size to stacking the top layer, each step ensures a sturdy and stylish result. Remember to follow safety guidelines and local regulations to keep your home safe. A well-built fire pit brings warmth and lasting memories to any location.
Now that you’ve learned the key steps, it’s time to take action. Gather your tools, choose your materials, and start your diy journey. Your new gathering spot will be ready for enjoyment in no time.
Explore more creative ideas to enhance your outdoor living. With a little effort, your backyard can become a true retreat. Start your project today and enjoy the benefits of a custom fire pit.
Also Read
Fire Pit Glass Safety Precautions
How Does a Smokeless Fire Pit Work
How to Build a Smokeless Fire Pit
Can One Cook on a Smokeless Fire Pit
How Far Should a Fire Pit Be From Your House?
Can You Put a Fire Pit on a Deck
What to Do with Fire Pit Ashes
Can One Cook Food on a Propane Fire Pit?
Guide to Starting a Fire Pit at Home
How to Use Propane Fire Pits the Best
How to Build a Stunning Fire Pit for Your Backyard
Fire Pit Safety Crucial Equipment

John Carter is a firepit expert with 10+ years of experience in outdoor heating solutions. He specializes in firepit selection, installation, and maintenance, sharing tips on DIY projects, product reviews, and backyard entertainment. Passionate about creating cozy outdoor spaces, he helps homeowners choose the perfect firepit for their needs