


Are you looking to transform your backyard into a cozy oasis? Want to add a touch of warmth and ambiance to your outdoor living space? Then it’s time to consider building a DIY fire pit in your backyard. But where do you start? What are the best fire pit ideas and designs that you can easily create yourself? And how can you ensure safety and proper construction practices?
In this article, we will explore easy and affordable DIY fire pit ideas that will take your backyard to the next level. From utilizing simple materials like stacked pavers and salvaged bricks, to repurposing items like retaining wall blocks and dye vats, we will provide you with the inspiration and guidance you need to create a stunning fire pit that suits your style and budget.
So, are you ready to turn your backyard into an outdoor paradise? Let’s dive in and explore the world of DIY fire pit ideas!
Key Takeaways:
- Building a DIY fire pit can transform your backyard into a cozy and inviting outdoor living space.
- There are numerous easy and affordable fire pit ideas, from using stacked pavers to repurposing items like retaining wall blocks and dye vats.
- Proper construction techniques and safety practices are crucial when building and using a fire pit in your backyard.
- Consider the aesthetics and landscaping around the fire pit to enhance its visual appeal and ensure safety.
- With a little creativity and DIY skills, you can create a beautiful fire pit that perfectly complements your outdoor space.
DIY Fire Pit with Retaining Wall Blocks
If you’re looking for an easy and affordable way to build a DIY fire pit in your backyard, using retaining wall blocks is a great option. This project is perfect for beginners and requires minimal materials.
To create your fire pit, start by stacking the retaining wall blocks in a circular or square shape. The blocks interlock securely, providing a sturdy foundation for your fire pit. Ensure that the blocks are leveled and aligned properly for the best results.
Once the blocks are in place, fill the center of the fire pit with sand. This helps to protect the ground underneath and provides an additional layer of insulation for the fire. Sand also helps to distribute heat evenly, ensuring a safe and enjoyable fire pit experience.
After filling the center with sand, top off your fire pit with pavers. Not only do pavers add a decorative touch, but they also create a smooth and level surface for seating and placing firewood.
Benefits of Using Retaining Wall Blocks
- Minimal materials required
- Affordable option
- Sturdy and durable
- No grout, mortar, or concrete required
Building a DIY fire pit with retaining wall blocks is not only a practical choice but also a great way to enhance your outdoor living space. The natural texture and color of the blocks add a rustic charm to your backyard, creating a cozy ambiance for gatherings and relaxation.
With just around $50 in materials, you can create a beautiful fire pit that will be the focal point of your outdoor living area. Gather around the crackling fire, roast marshmallows, and enjoy the warmth and comfort of your very own backyard fire pit.
“Building a DIY fire pit with retaining wall blocks is not only a practical choice but also a great way to enhance your outdoor living space.”
DIY Fire Pit with Hexagon-shaped Tabletop
Looking for a unique and stylish fire pit design? Consider building a hexagon-shaped tabletop fire pit that will add a touch of elegance to your outdoor space. This DIY project is both functional and visually appealing, making it the perfect addition to your backyard.
Building the Hexagon-shaped Tabletop
To start, gather lumber to construct the frame of the fire pit and fence boards to create a slatted table on top. The hexagon shape adds an interesting twist to the traditional round fire pit design.
Measure and cut the lumber to the desired size for the frame, ensuring all sides are of equal length. Fasten the pieces together securely using screws or nails, creating the hexagon shape.
“The hexagon shape of the tabletop fire pit adds a unique touch to your outdoor living space.” – Outdoor Living Magazine
Once the frame is complete, attach the fence boards to the top of the frame, leaving small gaps between each board. This allows for proper airflow and ventilation while providing a sturdy surface for placing drinks and snacks.
Fueling the Flames
When it comes to fueling your hexagon-shaped tabletop fire pit, there are a few options to consider. Gel fireplace fuel canisters provide a convenient and clean-burning option. They are easy to use and eliminate the need for storing firewood.
For a more eco-friendly approach, consider using eco logs. These logs are made from compressed recycled materials and produce less smoke and sparks compared to traditional firewood. They are a sustainable alternative that still provides warmth and ambiance.
Complete the Look
The hexagon-shaped tabletop fire pit blends in perfectly with other outdoor furniture, such as Adirondack chairs. Add some cozy cushions and blankets to create a comfortable seating area where you can relax and enjoy the warmth of the flames.
- Hexagon-shaped tabletop fire pit adds a unique and stylish touch to your outdoor space.
- Fuel the fire pit with gel fireplace fuel canisters for convenience or eco logs for an eco-friendly option.
- Create a cozy seating area with Adirondack chairs and comfortable cushions to complete the look.
With this DIY fire pit project, you’ll have a beautiful hexagon-shaped tabletop fire pit that will impress your guests and create a cozy ambiance in your outdoor living space. Get creative and enjoy the warmth and beauty of a crackling fire right in your backyard.
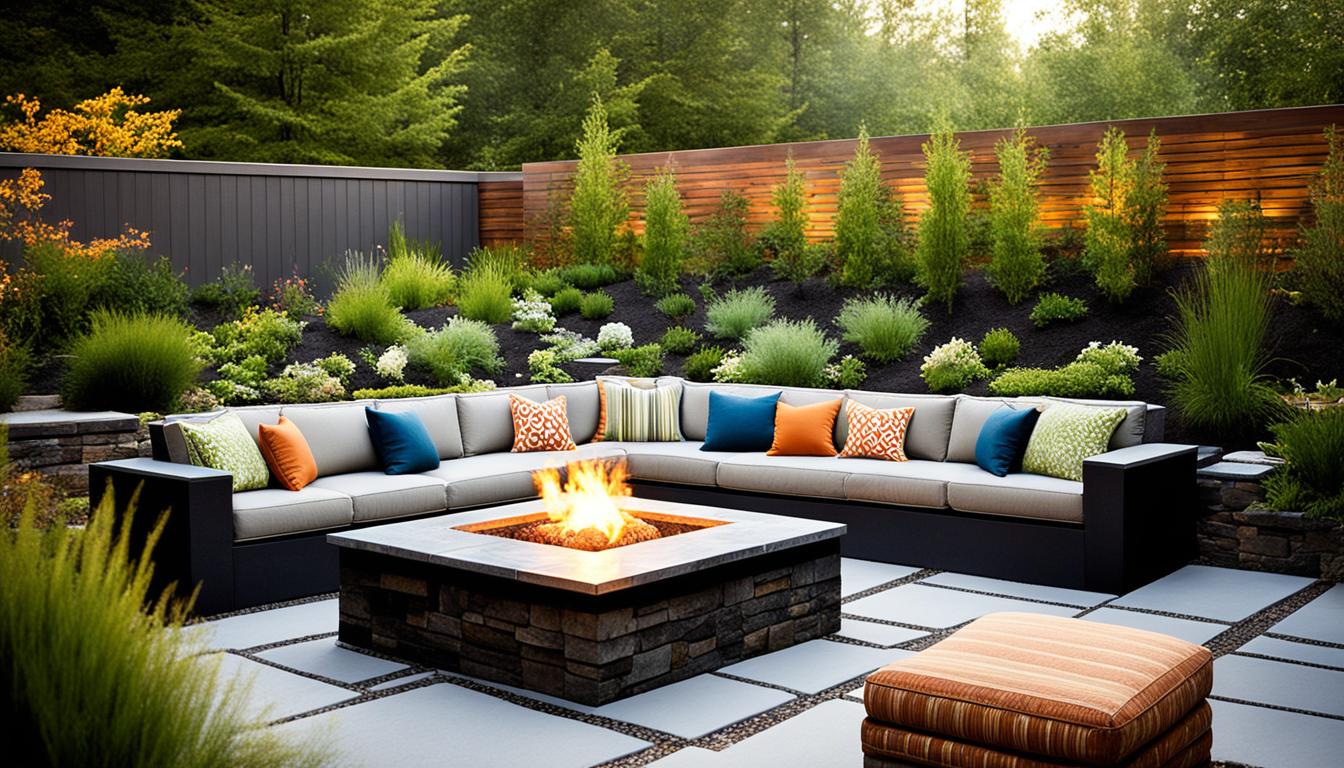
DIY Fire Pit with Bench
Enhance your fire pit area with a DIY fire pit bench. Mimic the round shape of the fire pit and create a curved bench that provides ample seating for your guests.
Decorate the bench with outdoor throw pillows in colorful fabrics to add comfort and style to your outdoor living space. This fire pit bench is a great addition to any backyard gathering, allowing you and your loved ones to cozy up around the fire, share stories, and create lasting memories.
“The curved design of the bench not only complements the fire pit’s shape but also encourages conversation and creates a welcoming atmosphere.”
To construct the fire pit bench, you can use a variety of materials such as wood, concrete, or metal. Choose a material that suits your aesthetic preferences and matches the overall style of your backyard.
If you opt for a wooden bench, consider treated lumber or weather-resistant wood species to ensure its durability in outdoor conditions.
To build the bench, start by measuring the circumference of your fire pit. This measurement will help you determine the appropriate length and curvature of the bench. Next, cut the wood pieces accordingly, ensuring they fit together seamlessly.
Secure the bench pieces together using screws or nails, and reinforce the structure if desired. You can also add a protective finish to the wood to enhance its longevity and weather resistance.
Place the bench around the fire pit, making sure it is positioned at a comfortable distance for sitting and enjoying the warmth of the fire. Arrange the outdoor throw pillows on the bench to create a cozy and inviting atmosphere for your guests.
Benefits of a Fire Pit Bench:
- Offers ample seating for guests, accommodating larger gatherings
- Mimics the round shape of the fire pit for a cohesive and aesthetically pleasing look
- Adds comfort and style with the addition of outdoor throw pillows
- Encourages conversation and creates a welcoming ambiance
- Provides a designated space to relax and enjoy the fire pit
With a DIY fire pit bench, you can transform your outdoor space into a cozy and inviting retreat. Gather your loved ones, sit back, and relax as you enjoy the warmth and beauty of your fire pit.
DIY Fire Pit with Stacked Pavers
Create a modern rustic look with a DIY fire pit made from stacked pavers. The whitewashed brick effect adds a touch of elegance to your outdoor space. This fire pit is easy to build and provides a stylish focal point for your backyard. It’s a great option for those who want a contemporary fire pit design with a natural feel.

Materials Needed:
- Stacked pavers
- Sand
- Fire pit insert or bowl
- Gravel
- Paver edging
- Shovel
- Rubber mallet
- Level
To start, choose the location for your fire pit and mark the area. Clear the area of any debris and make sure it is level.
Next, install the paver edging around the marked area. This will help keep the pavers in place and provide a clean finish.
Fill the marked area with a layer of gravel for drainage. Spread it evenly and compact it using a mallet.
Start stacking the pavers on top of the gravel, making sure to create a tight and secure fit. Use a level to ensure each layer is even.
After stacking the pavers to the desired height, fill the center with sand. This will provide a stable base for your fire pit insert or bowl.
Place the fire pit insert or bowl on top of the sand, making sure it is centered and secure.
Finally, arrange additional pavers around the perimeter of the fire pit to create a seating area or a decorative border.
“A DIY fire pit with stacked pavers is a perfect addition to any outdoor living space. The modern rustic look adds a touch of elegance, while the stacked design provides a unique focal point. Gather around the fire pit with family and friends, and enjoy cozy evenings in your backyard.”
With just a few materials and some basic DIY skills, you can create a beautiful fire pit with stacked pavers. This project is budget-friendly and will enhance your outdoor living area, providing a cozy and inviting atmosphere for gatherings and relaxation.
DIY Fire Pit with Repurposed Dye Vat
Add a unique touch to your outdoor space with a DIY fire pit made from a repurposed dye vat. Look for old garden ponds or vats lined with non-combustible rocks. Ensure that the lining is made of stone or concrete, not flammable materials like PVC or EPDM.
This repurposed dye vat fire pit adds character to your outdoor gatherings and is a great conversation starter. Its rustic charm and one-of-a-kind design make it the perfect centerpiece for cozy evenings or lively outdoor parties.
Repurposing Creativity
Repurposing items not only promotes sustainable living but also allows you to create unique and eye-catching fire pits. By giving a second life to a dye vat, you can transform an ordinary object into an extraordinary feature that showcases your creativity.
“A repurposed dye vat fire pit is a versatile and eco-friendly addition to any outdoor space. Its unconventional design and reimagining of materials make it a memorable feature for outdoor gatherings.” – Expert Designer
Non-Combustible Material Safety
When repurposing a dye vat for a fire pit, it’s crucial to ensure that the lining or interior of the vat is made of non-combustible materials like stone or concrete. This precaution will help prevent any fire hazards and ensure the longevity of your DIY fire pit.
Outdoor Gatherings
Imagine gathering around your repurposed dye vat fire pit with friends and family. Its unique design and warm ambiance will create a cozy atmosphere and provide an ideal focal point for your outdoor gatherings. Whether you’re roasting marshmallows for s’mores or simply enjoying the crackling flames, this DIY fire pit will make your outdoor space truly special.
- Perfect for intimate gatherings or large outdoor parties
- Adds a touch of nostalgia and creativity to your space
- Conversation starter and unique feature
- Creates a warm and inviting ambiance
With a repurposed dye vat fire pit, you can make your outdoor space stand out and enjoy memorable moments with your loved ones. Get creative, repurpose with style, and elevate your outdoor gatherings with this one-of-a-kind DIY fire pit.
DIY Fire Pit with Glass Frame Coverings
If you’re looking for a contemporary fire pit with a clean modern look, consider using glass frame coverings and a metal planter or terracotta planter. This DIY fire pit is affordable and easy to assemble. The glass frame coverings provide a sleek and stylish aesthetic, while the metal planter or terracotta planter holds the fire. It’s a great option for those who prefer a modern design for their fire pit.
“The combination of glass frame coverings and a metal or terracotta planter creates a stunning focal point in any outdoor space,” says landscaping expert Jane Cooper. “The transparency of the glass adds an elegant touch, allowing the beauty of the fire to shine through.”
With simple materials and straightforward construction, creating this DIY fire pit is a breeze. Start by choosing a metal planter or terracotta planter that complements your design preferences. Then, carefully measure and cut the glass frame coverings to fit the sides of the planter. Use adhesive or brackets to secure the glass to the planter, ensuring a sturdy and safe structure.
Once the glass frame coverings are in place, it’s time to set up the fire pit area. Clear any debris or flammable materials from the designated spot, ensuring a safe distance from buildings and vegetation. Place the metal or terracotta planter in the center of the fire pit area and add your preferred fire fuel, such as wood or eco-friendly fire gel.
To further enhance the ambiance, consider adding decorative elements around the fire pit, such as rocks, pebbles, or plants. You can also incorporate comfortable seating and outdoor lighting to create a cozy and inviting atmosphere. Remember to prioritize safety by keeping a fire extinguisher nearby and following local regulations regarding fire pit usage.

Advantages of a DIY Fire Pit with Glass Frame Coverings:
- Contemporary Design: The glass frame coverings lend a modern and sleek look to your outdoor space.
- Customizable: Choose the size and shape of the metal or terracotta planter to fit your aesthetic preferences.
- Affordable: This DIY fire pit can be built using cost-effective materials without compromising style.
- Easy Assembly: The construction process is straightforward, making it accessible to DIY enthusiasts of all skill levels.
Add a touch of elegance and sophistication to your backyard with a DIY fire pit featuring glass frame coverings. This contemporary design will transform your outdoor living space into a stylish and inviting oasis.
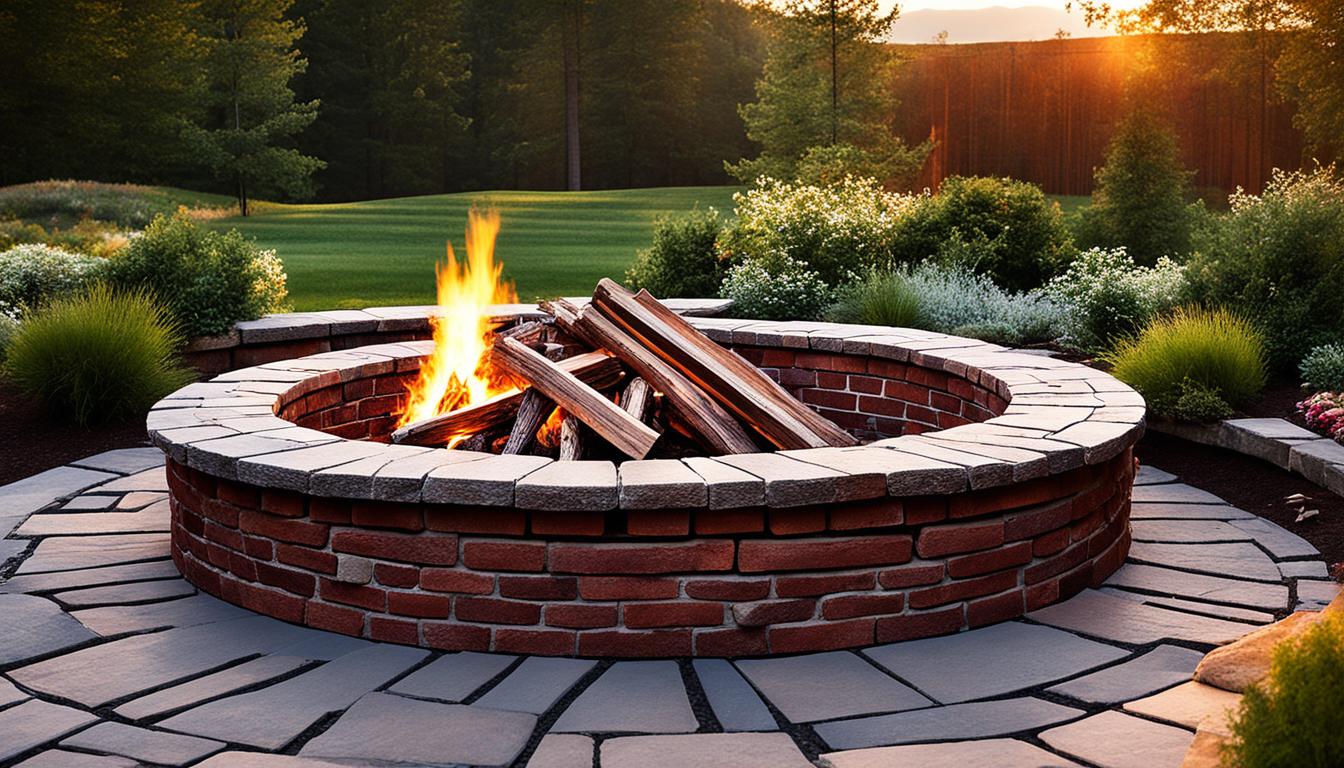
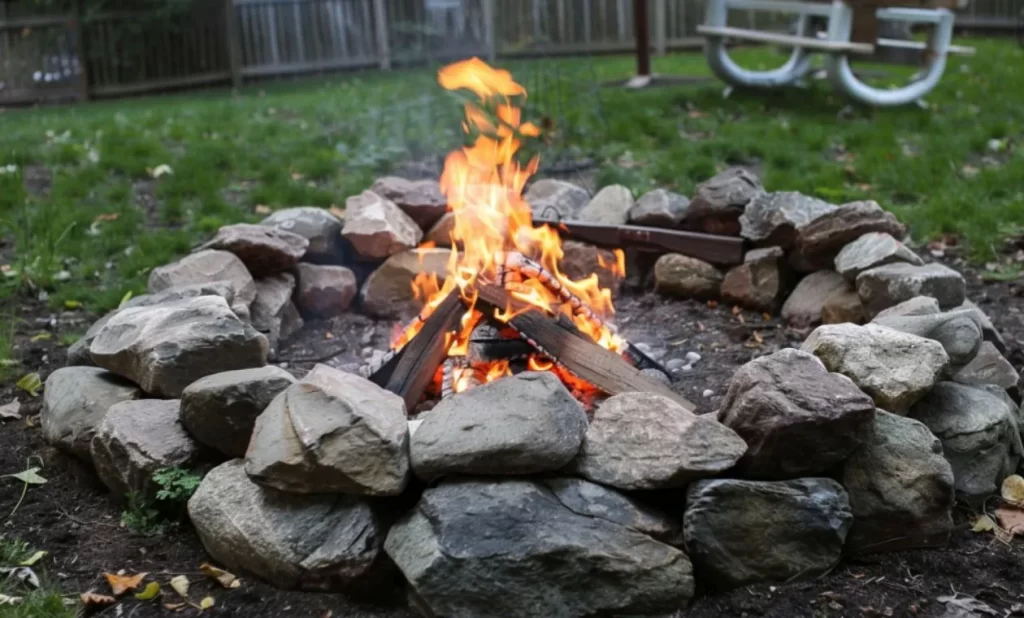
DIY Fire Pit with Salvaged Bricks
If you’re looking to create a minimalist in-ground fire pit design, salvaged bricks are the perfect material to use. These bricks can easily be found on sale or repurposed from previous projects, making them a cost-effective option for your DIY fire pit. Not only does the in-ground design add a touch of elegance to your backyard, but it also offers a seamless and integrated look with your outdoor space.
With their timeless appeal, salvaged bricks can be arranged in various patterns and styles to suit your aesthetic preferences. Whether you prefer a circular or rectangular shape, you can create a beautiful fire pit by stacking the bricks securely and leveling them carefully. This method ensures stability and longevity for your fire pit while maintaining a clean and minimalist look.
Additionally, salvaged bricks are not only visually pleasing but also durable and easy to maintain. Their natural composition allows for effective heat distribution, making them an ideal choice for your fire pit. Regular cleaning and occasional repositioning of the bricks will keep your fire pit looking its best for years to come.
By incorporating salvaged bricks into your DIY fire pit, you can add a touch of character and charm to your outdoor space. So, gather your materials, unleash your creativity, and ignite the warmth of a beautiful fire pit created with salvaged bricks.
Conclusion
Creating a DIY fire pit in your backyard is a fantastic way to transform your outdoor living space and enjoy cozy evenings with family and friends. With a wide variety of fire pit ideas and designs to choose from, you can easily find one that suits your style and budget.
Whether you opt for a fire pit constructed with retaining wall blocks, repurposed items like washing machine drums and Adirondack chairs, or salvaged bricks, there are endless possibilities to customize your fire pit and make it uniquely yours.
However, it is crucial to prioritize safety throughout the process. Follow proper fire pit construction techniques and consider landscaping around the fire pit to ensure both aesthetics and safety. Pay attention to fuel choices and adhere to fire pit safety practices to prevent accidents.
By using your creativity and DIY skills, you can transform your backyard into a warm and inviting space with a DIY fire pit. So go ahead, start planning, gather your materials, and start building your dream fire pit today!
Source Links
- https://www.thepioneerwoman.com/home-lifestyle/g43251857/outdoor-fire-pit-ideas/
- https://restore.tchabitat.org/blog/creative-diy-fire-pit-ideas
- https://www.thespruce.com/diy-backyard-fire-pits-4142011

Otis, 52, embodies a lifetime of adventure, from the rugged hills of the USA to serene camping spots worldwide. His passion for the outdoors isn’t just a hobby; it’s a way of life that includes hiking, camping, and exploring the unknown. With decades of experiences under his belt, Otis shares his adventures and lessons learned through Natural Fire Pit. Beyond fire pits, his expertise in outdoor living, from setting up the perfect tent to finding off-the-beaten-path travel destinations, guides fellow enthusiasts. Follow Otis’s journey for a deeper connection with nature.