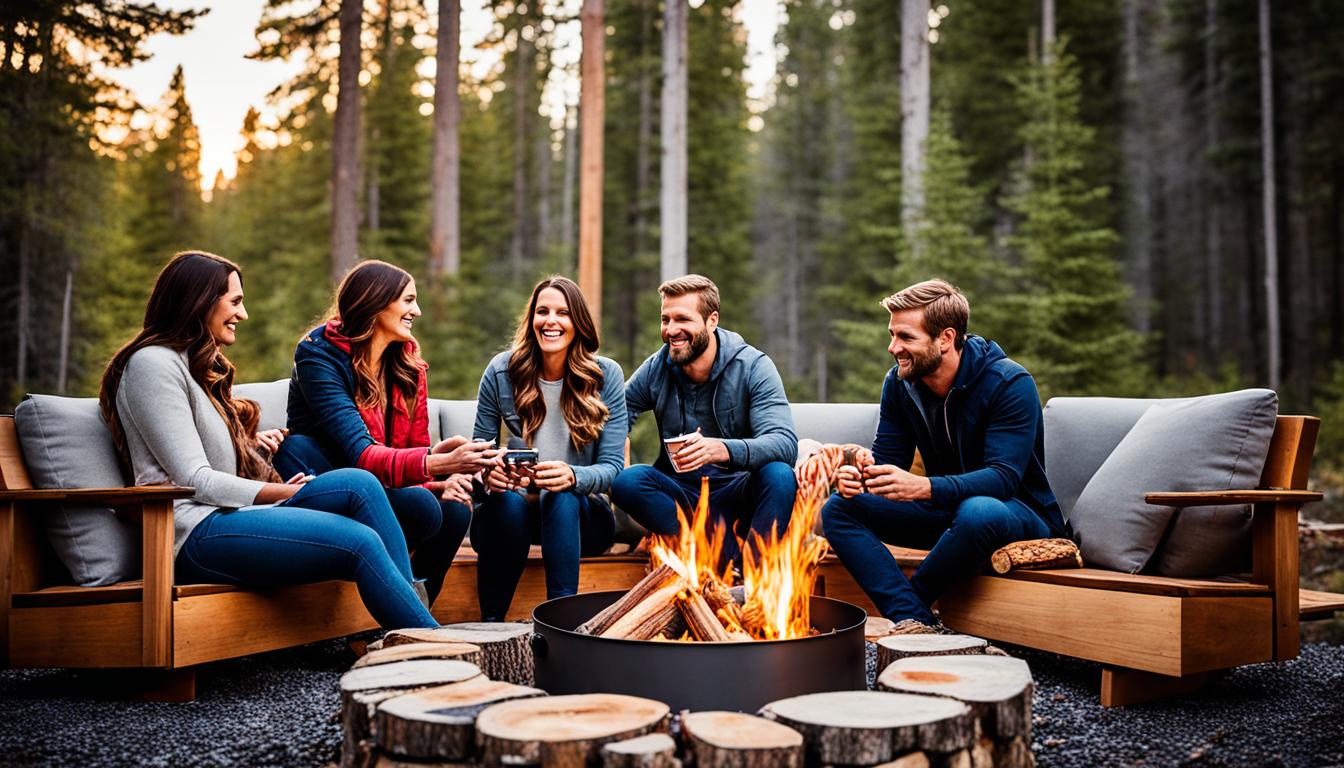


Imagine sitting by a crackling fire under the starry night sky, feeling the warmth on your face and the soothing sounds of nature all around you. That’s the magic of a Solo Stove, a portable fire pit that brings the joy of a campfire to your backyard or camping adventures. But how do you set it up and get started?
In this easy Solo Stove setup guide, we’ll walk you through the steps to assemble and install your Solo Stove, ensuring a hassle-free experience. Whether you’re a seasoned outdoor enthusiast or new to camping, our guide will help you ignite the fire and create unforgettable moments.
Key Takeaways:
- Follow our easy step-by-step guide to set up your Solo Stove quickly and hassle-free
- Choose the right fuel for optimal efficiency and longer burn times
- Prepare your Solo Stove by trimming down firewood and creating firestarters
- Light your Solo Stove fire using kindling and gradually adding logs
- Clean and store your Solo Stove properly for optimal performance
Choosing the Right Fuel for Your Solo Stove
When setting up your Solo Stove, one of the most crucial factors for optimal efficiency is selecting the right fuel. While any firewood logs will burn, certain types of wood are recommended to maximize burn times and overall performance. Dry hardwoods like birch, maple, hickory, and oak are highly recommended for their longer burn times and steady heat output.
On the other hand, softwoods can still be used but may not burn as long as hardwoods. Softwood options include pine, fir, and cedar. These woods ignite easily but tend to burn faster compared to hardwoods.
For the best results, it is advisable to use 4-6 average-sized logs in your Solo Stove, ensuring a balanced and efficient fire. This quantity offers the perfect balance between providing ample heat and minimizing the risk of overfilling the fire pit. Overfilling can restrict airflow and reduce the stove’s overall performance.
Benefits of using hardwoods for your Solo Stove:
- Longer burn times
- Steady heat output
- Less frequent refueling
- Produces less smoke
- Enhances Solo Stove efficiency
By selecting the right fuel and following the recommended quantity guidelines, you can ensure that your Solo Stove operates at its optimum efficiency, providing you with a memorable and enjoyable outdoor experience.
| Wood Type | Characteristics |
|---|---|
| Birch | Produces steady heat and minimal smoke |
| Maple | Burns slowly and generates consistent heat |
| Hickory | Offers a long burn time and imparts a distinct smoky flavor |
| Oak | Known for its long-burning properties and strong heat output |
| Pine | Ignites easily, but burns quickly and may produce more smoke |
| Fir | Similar to pine, burns faster and produces more smoke |
| Cedar | Often used for its pleasant aroma, burns quickly like other softwoods |
Remember, the quality of the wood and its moisture content also play a vital role in the Solo Stove’s efficiency. Ensure that the logs are well-seasoned and dry for optimal performance. Damp or wet wood can result in inefficient burning and excessive smoke production.
To summarize, choosing the right fuel, such as dry hardwoods like birch, maple, hickory, and oak, will significantly enhance the efficiency of your Solo Stove. By understanding the characteristics of different wood types, you can enjoy longer burn times, steady heat, and a more enjoyable outdoor experience.
Preparing Your Solo Stove for Setup
Before you begin setting up your Solo Stove, it’s crucial to properly prepare it for a successful fire experience. This section will guide you through the necessary steps to ensure a smooth setup process.
Gathering and Preparing Kindling
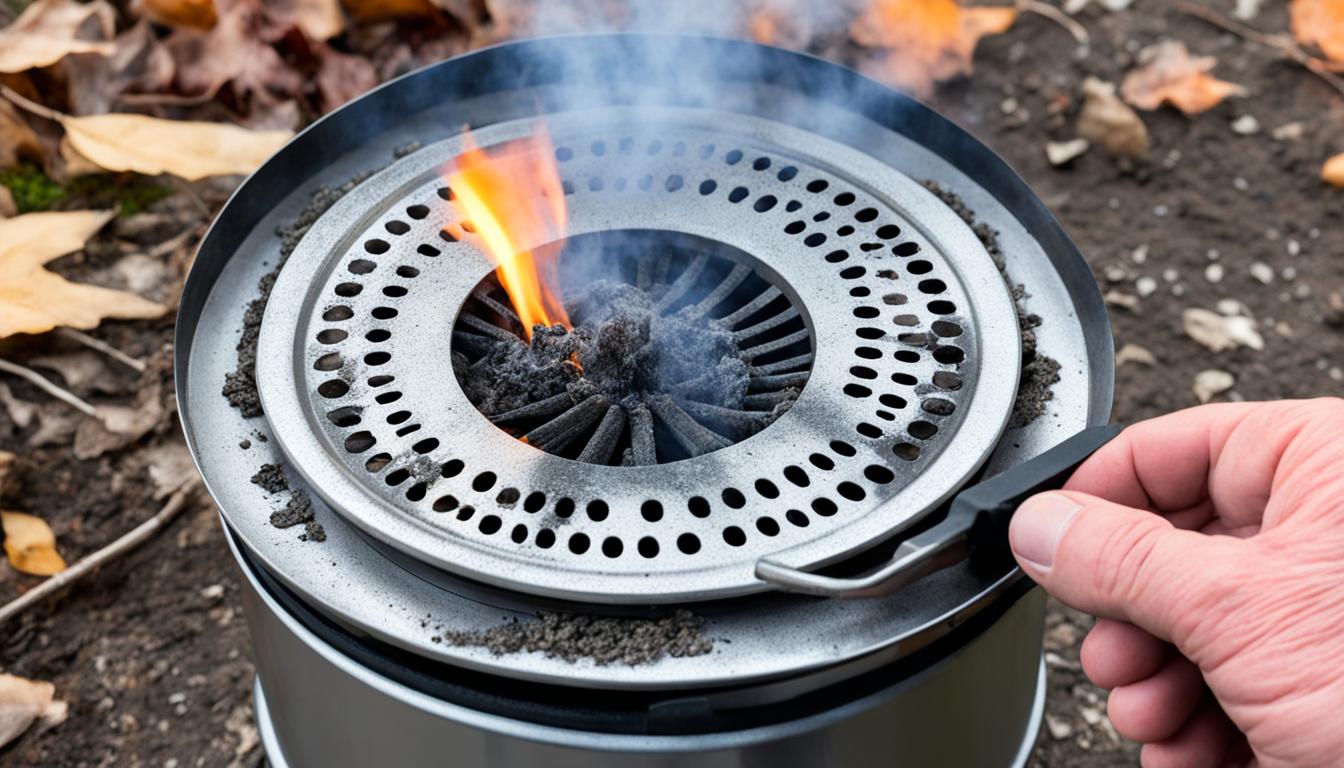
To get started, gather your firewood and prepare it into kindling. Kindling refers to small pieces of dry wood that help ignite the fire and establish a solid base. You have two options for preparing kindling:
- Using an axe or hatchet, carefully trim down your firewood into smaller, manageable pieces for kindling. This process allows for efficient burning and helps establish a consistent fire.
- If you prefer, you can also use chunk wood, which is pre-split firewood readily available for purchase. Chunk wood provides convenience and reduces the need for manual preparation.
Creating Effective Firestarters
A successful fire setup requires reliable firestarters that ignite easily and sustain the flame. Here are some options for creating effective firestarters:
- Use newspaper: Crumple up newspaper sheets into tight balls, creating compact firestarters that provide a consistent burn.
- Save dryer lint: Collect dryer lint from your laundry and store it in a dry, sealed container for use as firestarters. It easily catches fire and helps kickstart your Solo Stove fire.
- Consider Solo Stove Starters: Solo Stove offers specialized firestarters that are designed to ignite quickly and efficiently, providing a hassle-free fire setup experience.
Once you have your kindling and firestarters ready, you can proceed to setting up your Solo Stove.

| Preparation Steps | |
|---|---|
| Lay your kindling in a compact square shape on the base plate of your Solo Stove fire pit. | |
| Add a few firestarters evenly spaced among the kindling. | |
| Take precautionary measures relating to smoke, sparks, or embers that may be produced during the lighting process. | |
| Light the firestarters using a long-reach lighter or matches. | |
| Monitor the fire as it catches and spreads to the kindling. Once a steady flame is established, you can add larger logs or firewood. |
By following these steps, you’ll have your Solo Stove fully prepared and ready to enjoy the warmth and ambiance of a perfect outdoor fire.
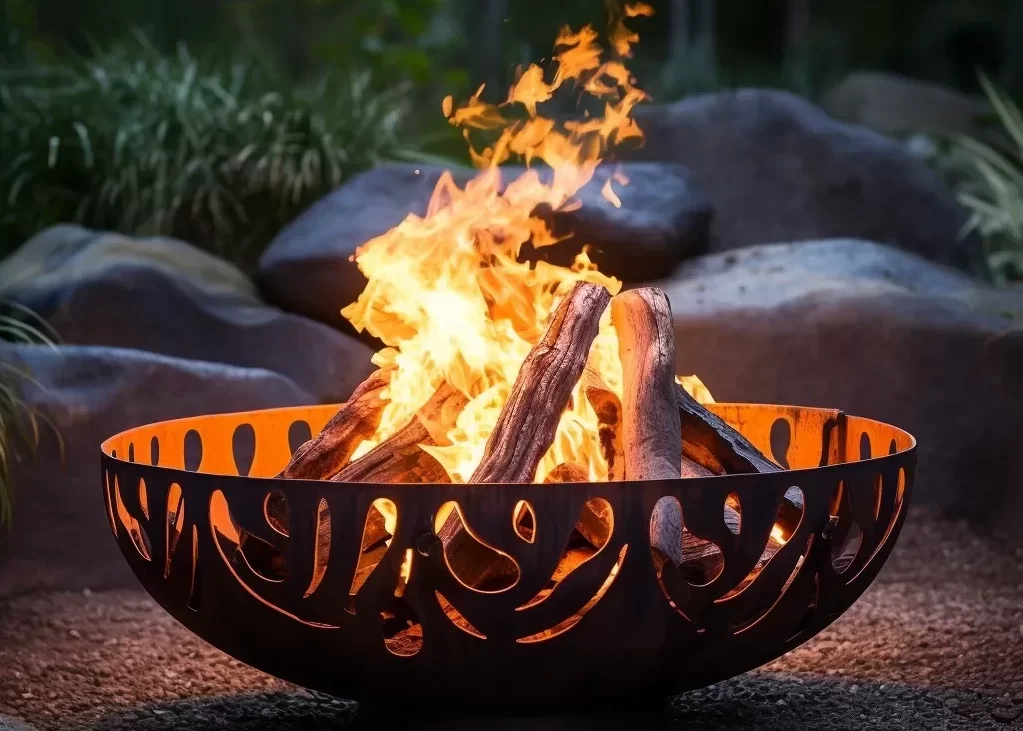
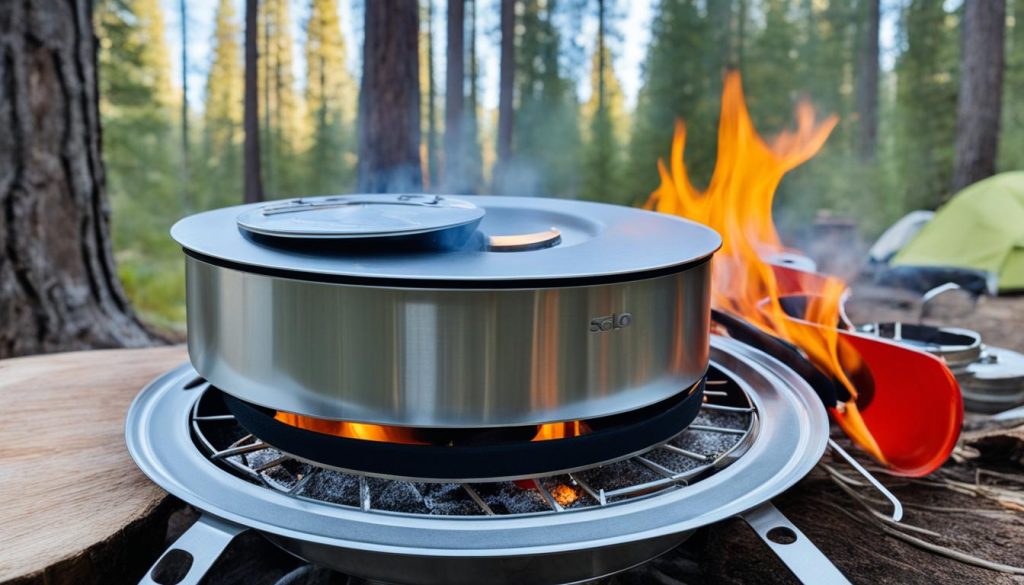
Lighting Your Solo Stove Fire
Once your firestarters have caught on fire, it’s time to continue the process of lighting your Solo Stove. Building a well-structured fire within your Solo Stove is essential to ensure optimal heat output and efficiency. Here are some tips to help you achieve a successful fire lighting experience:
- Add More Kindling: After your firestarters have caught on fire, add more kindling in a cone shape above them. This will help the fire spread to the surrounding pieces of wood. Kindling acts as the primary fuel source to ignite and sustain the fire.
- Use Chunk Wood if Necessary: If you run out of kindling, don’t worry! You can use chunk wood as a substitute. However, it’s important to remember that chunk wood may burn at a different rate than kindling. Adjust your firewood selection based on the desired burn time and intensity.
- Ensure Proper Airflow: Proper airflow is crucial for a well-burning fire. Make sure that your Solo Stove’s air vents are open and unobstructed. This allows for efficient combustion and minimizes smoke generation.
- Add Firelogs: Once the kindling is fully caught and producing a steady flame, it’s time to add firelogs. Firelogs are denser and can provide a longer burn time compared to kindling. Place the firelogs under the secondary burn holes in your Solo Stove to ensure a smokeless fire and maximize heat output.
- Avoid Touching the Fire Pit: Remember, the Solo Stove fire pit will become extremely hot during the burning process. Avoid touching the exterior of the fire pit to prevent burns or injuries. Use appropriate fireproof gloves or tools if necessary.
Following these tips will help you successfully light your Solo Stove fire and enjoy a smokeless and efficient outdoor experience.

Solo Stove Fire Lighting Tips
“Properly lighting your Solo Stove fire ensures efficient combustion, a smokeless flame, and a cozy outdoor ambiance.” – Outdoor Enthusiast Magazine
| Tips for Successful Solo Stove Fire Lighting |
|---|
| 1. Gather dry and seasoned firewood for optimal burn time and heat output. |
| 2. Use firestarters such as newspaper, dryer lint, or Solo Stove Starters to ignite your fire effectively. |
| 3. Arrange kindling in a cone shape above the firestarters to facilitate the spread of flames. |
| 4. Maintain proper airflow by keeping the air vents open and unobstructed. |
| 5. Place firelogs under the secondary burn holes to achieve a smokeless fire. |
| 6. Always exercise caution and avoid touching the hot fire pit during and after the fire lighting process. |
Cleaning and storing your Solo Stove
Once you have enjoyed a cozy night around your Solo Stove, it’s important to properly clean and store it for future use. By following a few simple steps, you can ensure that your Solo Stove remains in great condition and ready for your next outdoor adventure.
- Allow the Solo Stove to Cool Down: Before starting the cleaning process, make sure that the Solo Stove has completely cooled down. This will help prevent any accidental burns or injuries.
- Turn the Solo Stove Upside Down: Once the Solo Stove is cool, carefully turn it upside down to empty out any remaining ashes. This will help keep the stove clean and free from debris.
- Give It a Quick Shake: After emptying the ashes, give the Solo Stove a quick shake to remove any loose debris or particles. This will help ensure that the stove is clean and ready for storage.
- Store in a Cool and Dry Place: When not in use, it’s important to store your Solo Stove in a cool and dry place. This helps prevent moisture buildup and protects the stove from rust or other damage. Consider using a protective cover or a designated storage bag to keep it safe and secure.
- Maintain Regular Cleaning: To keep your Solo Stove performing at its best, it’s recommended to clean it regularly. Remove any remaining ashes or debris after each use, and periodically check for any signs of buildup or blockage. This ensures optimum airflow and efficient combustion.
Cleaning and properly storing your Solo Stove not only extends its lifespan but also ensures that it’s always ready for your next outdoor gathering or camping trip. With these simple maintenance steps, you can enjoy the convenience and reliability of your Solo Stove for years to come.
Safety Tips for using your Solo Stove
When using your Solo Stove, it’s important to prioritize safety to ensure a pleasant outdoor experience. Follow these precautions to stay safe while enjoying your Solo Stove:
- Avoid touching the fire pit: The fire generated by your Solo Stove can reach extremely high temperatures. To prevent burns, never touch any part of the fire pit while it’s lit or recently extinguished.
- Supervise children: Make sure children are under adult supervision when they are near the Solo Stove. Educate them about the dangers of fire and ensure they stay a safe distance away from the fire pit.
- Use your Solo Stove outdoors: Solo Stoves are designed for outdoor use only. Make sure to set up and use your Solo Stove in a well-ventilated area away from flammable materials and structures.
- Clear the surroundings: Ensure that the area around your Solo Stove is clear of debris, dry leaves, and other flammable objects. This will help prevent accidental fires or dangerous flare-ups.
- Keep a fire extinguisher or water nearby: In case of an emergency, have a fire extinguisher or a bucket of water readily available. This will help you quickly extinguish the fire if needed.
- Extinguish the fire properly: When you’re finished using your Solo Stove, allow the fire to burn down completely. Once the fire has extinguished, carefully douse any remaining embers with water to ensure they are fully out.
Remember, using a Solo Stove can provide you with a safe and enjoyable outdoor fire experience as long as you take the necessary precautions.
| Solo Stove Safety Tips | Description |
|---|---|
| Avoid touching the fire pit | Protect yourself from burns by refraining from touching the hot Solo Stove fire pit. |
| Supervise children | Ensure children are under adult supervision to prevent accidents and injuries. |
| Use your Solo Stove outdoors | Enjoy your Solo Stove in a well-ventilated outdoor space to prevent indoor hazards |
| Clear the surroundings | Remove flammable materials from the area around your Solo Stove to prevent accidental fires. |
| Keep a fire extinguisher or water nearby | Be prepared in case of emergencies by having the necessary firefighting tools on hand. |
| Extinguish the fire properly | Ensure the fire is fully extinguished before leaving your Solo Stove unattended. |
Conclusion
Setting up a Solo Stove doesn’t have to be complicated. By following our easy setup guide, you can quickly and easily enjoy the benefits of a smokeless fire. Remember to choose the right fuel, prepare your fire pit, and follow proper safety precautions.
When it comes to fuel, opt for dry hardwoods like birch, maple, hickory, and oak for optimal burn times. Ensure that you have enough kindling and firestarters to kickstart your fire, and add firelogs to sustain the flames.
As you enjoy your Solo Stove, remember to exercise caution and keep children under parental supervision. Be mindful of the fire’s heat and avoid touching any part of the fire pit. After use, clean out any ashes and store your Solo Stove in a cool and dry place.
With your Solo Stove properly set up, you can now relax and enjoy the warmth and ambiance of an outdoor fire. Gather around with friends and family, roast marshmallows, and create cherished memories while basking in the beauty of a smokeless fire.
Recommended