


Are you looking to transform your backyard into a cozy and inviting space? What if we told you that you can create a stunning fire pit with just a few cinder blocks? Yes, you read that right – cinder blocks! Forget about expensive outdoor furniture or complicated construction projects. With our step-by-step guide, you’ll learn how to build a fire pit that combines functionality with a unique design using affordable and readily available materials.
Whether you’re hosting summer barbecues, cozying up on chilly evenings, or simply enjoying quality time with loved ones, a fire pit adds warmth and ambiance to any outdoor gathering. So, why wait? Let’s dive into the world of DIY fire pit construction and unleash your creativity!
Key Takeaways:
- Create a functional fire pit with cinder blocks
- Save money by using affordable materials
- Enhance your backyard with a unique design
- Enjoy warmth and ambiance all year round
- Build a gathering spot for friends and family
Materials and Tools Needed
Before embarking on your fire pit construction project, it’s important to gather all the necessary materials and tools. The following is a list of essential items you will need:
Cinder Blocks
The foundation of your fire pit will be built using cinder blocks. Opt for durable and heat-resistant blocks specifically designed for outdoor use.
Adhesive
To ensure stability and structural integrity, you will need adhesive designed for masonry projects. This will help secure the cinder blocks together.
Gravel
Gravel is necessary for creating a solid base and proper drainage for your fire pit. It will be used to fill the bottom of the pit.
Tools
- Tape measure
- Masonry saw or chisel
- Level
- Rubber mallet
- Trowel
- Broom
- Brush
- Safety gloves and goggles
These tools will aid you in measuring, cutting, leveling, and assembling the cinder blocks, ensuring a smooth construction process.
Now that you have a comprehensive list of the materials and tools needed, you’re ready to start building your cinder block fire pit.
Finding the Ideal Location
Choosing the right location for your fire pit is crucial. Not only does it impact the overall aesthetic of your outdoor space, but it also ensures safety and convenience for you and your guests. Here are some tips to help you find the ideal location for your outdoor fire pit using cinder blocks.
Safety First
Safety should be your top priority when choosing the location for your fire pit. Make sure to:
- Keep the fire pit at least 10 feet away from any structures, including your house, fences, or trees. This helps prevent accidental fires and ensures proper ventilation.
- Select an area with a level and stable surface to avoid any accidents or tipping of the fire pit.
Consider Wind Direction
Take into account the prevailing wind direction in your area when deciding where to place your fire pit. You want to avoid smoke blowing directly toward seating areas or your house. Position the fire pit so that the wind carries the smoke away from your desired gathering spot.
| Pros | Cons |
|---|---|
| Natural ventilation and smoke dissipation. | Potential smoke nuisance if positioned incorrectly. |
Create a Focal Point
Your fire pit can serve as a central focal point in your backyard design. Consider placing it in an area that commands attention and enhances the overall ambiance of your outdoor space. Here are some creative backyard fire pit ideas using cinder blocks:
- Position the fire pit in the center of a cozy seating area, surrounded by comfortable chairs or built-in benches.
- Place the fire pit at the end of a garden path, creating a captivating feature that draws visitors into the space.
- Incorporate the fire pit into an existing outdoor kitchen or patio area, making it a functional and stylish addition to your entertaining space.

“A well-placed fire pit can transform your backyard into a cozy retreat where you can gather with loved ones and create lasting memories.”
Remember, the ideal location for your fire pit ultimately depends on your specific preferences, space limitations, and local regulations. Take the time to consider these factors as you envision and plan your outdoor fire pit using cinder blocks.
Preparing the Ground
Before you begin building your cinder block fire pit, it’s crucial to prepare the ground properly. This step is essential for ensuring the stability and longevity of your fire pit. Follow our step-by-step guide to create a solid foundation:
- Choose the location: Select a suitable area in your backyard for the fire pit. Ensure it is far from any flammable structures or materials.
- Clear the area: Remove any vegetation, rocks, or debris from the ground where the fire pit will be placed. This will help create a level surface.
- Mark the perimeter: Use stakes and string to outline the shape and size of the fire pit area. This will serve as a guide during the construction process.
- Level the ground: Use a shovel and rake to level the ground within the marked perimeter. This will help provide a stable base for the cinder blocks.
- Add a layer of gravel: Spread a layer of gravel evenly over the leveled ground. This will improve drainage and prevent the ground from becoming soggy when it rains.
By following these steps, you will create a sturdy and well-prepared foundation for your cinder block fire pit. Once the ground is ready, you can move on to building the base of the fire pit.
Important Tip:
It’s essential to check your local regulations and codes regarding fire pits before proceeding with the construction. Ensure compliance with any safety guidelines or restrictions in your area.
| Advantages of Preparing the Ground | Possible Challenges |
|---|---|
|
|
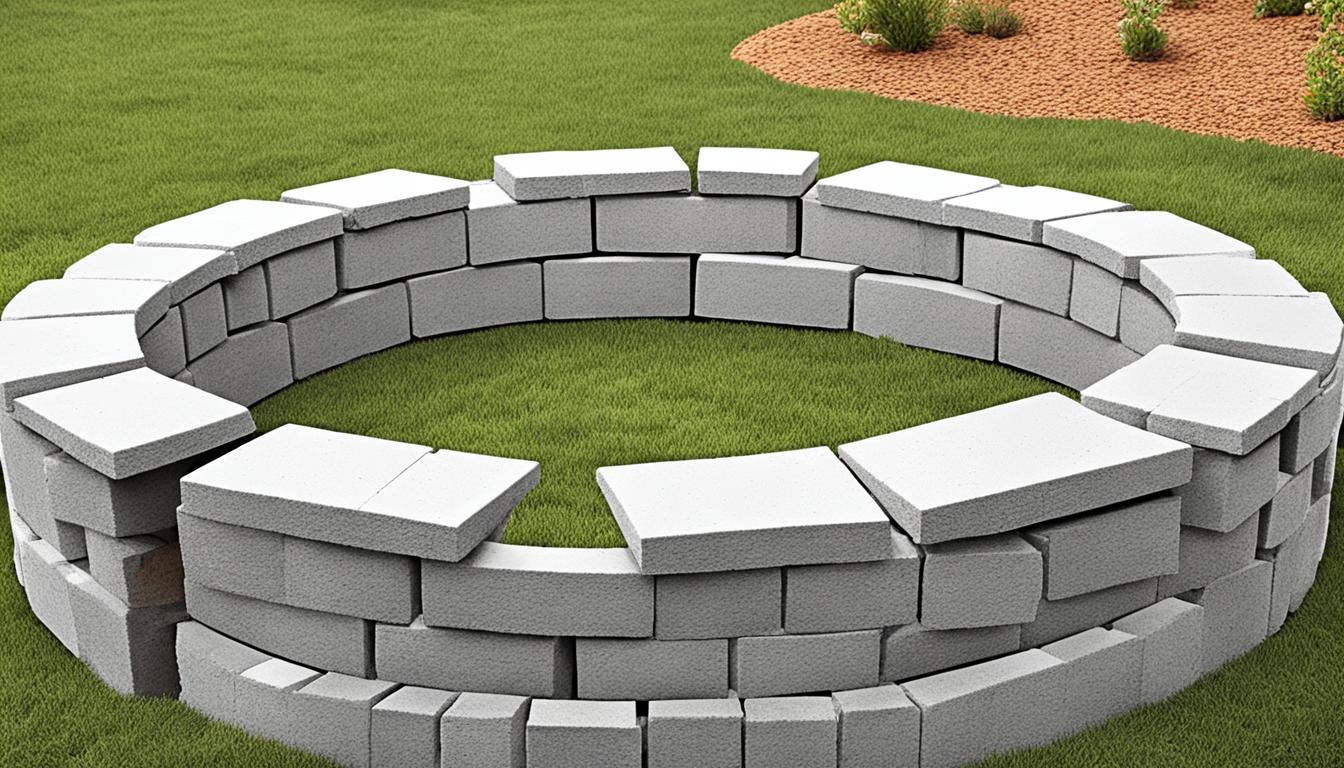
Building the Fire Pit Base
Building a solid base is essential for the structural integrity of your fire pit. Without a strong foundation, your fire pit may not withstand the test of time. In this section, we will guide you through the process of laying the first layer of cinder blocks, ensuring stability and durability for your fire pit construction.
Step 1: Gather Your Materials
Before starting, make sure you have all the necessary materials:
- Cinder blocks
- Construction adhesive
- Gravel or sand
- Tape measure
- Level
- Trowel
Having these items on hand will help streamline the construction process and ensure a successful outcome.
Step 2: Prepare the Ground
Before laying the cinder blocks, it’s important to prepare the ground properly. Start by clearing the area of any debris or vegetation. Use a shovel to level the ground and remove any uneven patches. This will provide a stable and even surface for your fire pit base.
Step 3: Level and Position the First Layer
Begin by placing the first layer of cinder blocks on the prepared ground. Use a tape measure to ensure the blocks are positioned evenly and at the desired distance apart.

Apply a thin layer of construction adhesive to the bottom of each cinder block before placing it in position. This will provide additional stability and prevent shifting over time.
Use a level to make sure each block is perfectly level and aligned with the previous one. Adjust as needed to achieve a uniform and sturdy foundation for your fire pit.
Pro tip: If your fire pit design includes corners or turns, consider using corner cinder blocks or cutting regular blocks to fit. This will help maintain the structural integrity and overall appearance of your fire pit.
Repeat this process for the entire first layer of cinder blocks, making sure each block is secured with construction adhesive and leveled properly.
Step 4: Add Gravel or Sand
Once the first layer is complete, fill the interior of the fire pit base with gravel or sand. This will provide a stable and heat-resistant base for your fire pit.
| Material | Benefits |
|---|---|
| Gravel | Allows for proper drainage and prevents water accumulation |
| Sand | Provides a level surface and helps distribute heat evenly |
Choose the material that aligns with your specific needs and preferences.
Once you’ve added the gravel or sand, use a level to ensure it’s evenly spread across the base. This will create a solid foundation for the next layer of your fire pit.
Now that you’ve successfully built the base of your fire pit with cinder blocks, it’s time to move on to the next step – constructing the fire pit walls. Stay tuned for our step-by-step guide in the upcoming section.
Constructing the Fire Pit Walls
Now that the base is complete, it’s time to move on to constructing the walls of your fire pit. This step is crucial for both the functionality and aesthetics of your DIY project. Follow our detailed instructions to stack the cinder blocks, create the desired height, and achieve a visually appealing design for your fire pit.
1. Start by placing the first layer of cinder blocks on top of the base. Ensure that they are evenly spaced and level.
2. Apply a layer of adhesive between each block to enhance stability.
3. Continue stacking the blocks, following the desired height for your fire pit. Take your time to align the blocks and maintain a uniform appearance.
4. Use a level to check the vertical alignment of the blocks as you stack them.
5. Consider incorporating a decorative pattern or design by alternating the direction or color of the cinder blocks.
6. For added stability, fill the gaps between the blocks with a layer of adhesive or mortar.
“The walls of your fire pit not only provide support but also contribute to the overall visual appeal. Get creative and experiment with different arrangements to personalize your design.”
Here’s a visual representation of how the construction process should look:
| Cinder Block Layout | Step-by-Step Instructions |
|---|---|
 |
1. Start by placing the first layer of cinder blocks on top of the base. 2. Apply a layer of adhesive between each block. 3. Continue stacking the blocks, maintaining alignment. 4. Use a level to check the vertical alignment. 5. Consider incorporating a decorative pattern. 6. Fill gaps between blocks with adhesive or mortar. |
By following these steps, you will be able to create structurally sound walls that enhance the functionality and charm of your cinder block fire pit. Once the walls are complete, you can move on to adding the finishing touches to your project.
Adding Finishing Touches
Now that your cinder block fire pit is taking shape, it’s time to add those special finishing touches that will enhance both the functionality and aesthetics of your outdoor space. From seating walls to fire pit liners, these optional features will elevate the overall look and feel of your affordable cinder block fire pit. Let’s explore some creative ideas to make your fire pit stand out.
1. Seating Walls:
Consider incorporating seating walls around your fire pit to provide comfortable and convenient seating for your guests. These low walls can be constructed using cinder blocks, offering a durable and cost-effective solution. Arrange the blocks in a circular or rectangular pattern and use mortar to secure them in place. Add cushions or outdoor seating for a cozy gathering space.
2. Fire Pit Liners:
To protect the interior of your fire pit and prolong its lifespan, you can install a fire pit liner. These steel or stainless steel inserts are designed to contain the fire and prevent damage to the surrounding cinder blocks. Choose a liner that matches the size and shape of your fire pit and follow the manufacturer’s instructions for proper installation.
3. Decorative Elements:
Add a touch of personality and style to your cinder block fire pit by incorporating decorative elements. Consider using colorful glass rocks or lava stones as a decorative filler inside the pit. You can also attach metal or ceramic tiles to the exterior of the cinder blocks for a unique and visually appealing design. Let your creativity shine to create a fire pit that reflects your personal taste.
Recommended Materials for Finishing Touches
| Feature | Recommended Materials |
|---|---|
| Seating Walls | Cinder blocks, mortar, cushions or outdoor seating |
| Fire Pit Liners | Steel or stainless steel fire pit liner |
| Decorative Elements | Glass rocks, lava stones, metal or ceramic tiles |
By adding these finishing touches to your cinder block fire pit, you can create a functional and visually appealing outdoor space that will impress your guests and provide countless memorable moments. Let your imagination guide you as you personalize your fire pit to suit your style and preferences.
Fire Pit Safety and Maintenance
Safety is of utmost importance when it comes to enjoying your DIY fire pit with cinder blocks. By following essential safety measures, you can ensure a secure and pleasant experience for yourself and your loved ones. Additionally, proper maintenance will contribute to the longevity and functionality of your fire pit.
Fire Pit Placement
When selecting the placement for your fire pit, consider the surroundings and potential hazards. Choose a location that is away from flammable objects such as trees, shrubs, and buildings. Ensure that the fire pit is positioned on a non-combustible surface, such as concrete or gravel. This will minimize the risk of accidental fires spreading.
Ventilation
Proper ventilation is crucial for a safe and efficient fire pit. Ensure that the area around the fire pit is well-ventilated, allowing for an adequate supply of fresh air. This will help prevent the buildup of smoke and carbon monoxide, creating a healthier environment for everyone.
Regular Maintenance
Perform regular maintenance tasks to keep your fire pit in optimal condition. Clean out any ash or debris after each use to prevent blockages and maintain proper airflow. Inspect the cinder blocks for any signs of damage or deterioration, and replace them if necessary. Regularly check the stability of the fire pit walls and make any required repairs to ensure ongoing safety.
Protective Measures
Consider implementing protective measures to enhance safety while using your fire pit. This may include installing a spark screen or mesh to prevent flying embers, especially in windy conditions. Keep a fire extinguisher or a bucket of sand nearby to quickly extinguish any small fires that may occur.
Remember to follow local regulations and guidelines regarding fire pit usage. Some areas may have specific restrictions or requirements that you need to adhere to.
By prioritizing safety and performing regular maintenance, you can enjoy your DIY fire pit with cinder blocks with peace of mind. Create memorable moments with family and friends around the warm glow of your fire pit while ensuring a safe and enjoyable outdoor experience.
Conclusion
Building a fire pit with cinder blocks is a rewarding DIY project that transforms your outdoor space into a cozy haven. By following the step-by-step guide and utilizing the tips and ideas shared in this article, you now have the knowledge and inspiration to create your own functional and visually appealing fire pit.
Imagine the warmth of the fire, the crackling sound, and the inviting ambiance it will bring to your backyard gatherings. With the right materials and tools, you can easily construct a fire pit that suits your style and meets your needs.
Remember to prioritize safety and proper maintenance to ensure the longevity of your cinder block fire pit. Choose a suitable location, maintain proper ventilation, and stay mindful of fire pit regulations in your area.
Now, it’s time to enjoy the delightful experience of gathering around your very own fire pit. With the satisfaction of completing this project, you can relax, unwind, and create lasting memories with family and friends. Embrace the warmth, embrace the cozy, and embrace the magic of your new backyard feature.
How much did you like Our detailed Blog”? Review Also, please share these Blogs with your friends on social media.
Recommended