


Are you looking to elevate your backyard gatherings and create a cozy outdoor ambiance? Have you ever considered building a fire pit with rocks? Not only is it a budget-friendly option, but it also adds a rustic touch to your outdoor space. So, how exactly can you build a fire pit with rocks? Let’s dive into the step-by-step guide and discover how you can easily create your own DIY fire pit using rocks!
Key Takeaways:
- Building a fire pit with rocks is an affordable way to enhance your backyard.
- By following a step-by-step guide, you can easily create your own DIY fire pit.
- Rocks add a rustic touch and create a cozy ambiance for outdoor gatherings.
- With proper maintenance, your fire pit will remain functional and visually appealing.
- Explore different designs and ideas to personalize your fire pit with rocks.
Choosing the Right Location for Your Fire Pit
Before you embark on the exciting journey of building your own fire pit, it’s crucial to select the perfect location in your backyard. The right spot can enhance the aesthetics and functionality of your rock fire pit, creating a relaxing and inviting ambiance.
When considering potential sites for your fire pit, keep in mind the following:
- Distance from combustible materials: Ensure that your fire pit is at a safe distance from any flammable structures, trees, or vegetation.
- Wind direction: Take note of the prevailing wind direction in your area. Position your fire pit accordingly to minimize smoke and discomfort.
- Safety and comfort: Choose a location that offers easy access and ample seating options for you and your guests.
Now, let’s explore some rock fire pit ideas that incorporate the beauty of natural stone:
1. Rustic and Natural
Create a charming and organic look by using natural stone to build your fire pit. The irregular shapes and textures of the rocks will lend a rugged and authentic appeal to your outdoor space.
2. Stacked Stone Elegance
For a more refined and sophisticated design, consider using stacked stone to create a seamless and polished look. This style is perfect for those who prefer a modern and tailored aesthetic.
3. River Rock Retreat
Add a touch of serenity to your backyard with a fire pit surrounded by river rocks. The smooth, round stones create a calming atmosphere and blend seamlessly with the surrounding landscape.
Remember to choose a location that complements your chosen rock fire pit design. Whether you opt for a rustic, elegantly stacked, or river rock-inspired fire pit, the right location will maximize your enjoyment of this cozy outdoor feature.
| Rock Fire Pit Ideas | Natural Stone Fire Pit | Backyard Fire Pit with Rocks |
|---|---|---|
| Rustic and Natural | Stacked Stone Elegance | River Rock Retreat |
| The irregular shapes and textures of natural stones create a rugged and authentic look. | Stacked stone offers a refined and sophisticated aesthetic for a modern appeal. | River rocks bring a serene and calming ambiance to your backyard fire pit area. |
Gathering the Necessary Tools and Materials
To successfully build a fire pit with rocks, it’s important to gather the right tools and materials. This step-by-step guide will walk you through what you’ll need and provide tips on where to source them.
Tools:
Before you begin, make sure you have the following tools handy:
- Shovel
- Rake
- Level
- Mallet
- Gloves
- Measuring Tape
Materials:
Here are the materials you’ll need for your DIY fire pit:
- Fire bricks or heat-resistant stones
- Gravel
- Sand
- Stakes and twine (for marking the fire pit area)
- Fire pit insert or fire ring (optional, for added safety)
- Adhesive (if necessary, depending on your chosen design)
These tools and materials will ensure that you have everything necessary to build a fire pit with rocks easily.
Tip: When sourcing the materials, consider visiting your local home improvement store or landscape supply center. They often have a variety of options to choose from and can provide expert advice on selecting the most suitable rocks and materials for your fire pit project.
Now that you have a clear understanding of the tools and materials needed, you’re ready to move on to the next step: Preparing the Fire Pit Area.

| Tools | Materials |
|---|---|
| Shovel | Fire bricks or heat-resistant stones |
| Rake | Gravel |
| Level | Sand |
| Mallet | Stakes and twine |
| Gloves | Fire pit insert or fire ring |
| Measuring Tape | Adhesive |
Preparing the Fire Pit Area
Before you start building your fire pit with rocks, it’s important to prepare the area properly. This step is crucial for ensuring a sturdy and long-lasting fire pit with a rustic charm.
Here is a step-by-step guide to help you prepare the fire pit area:
- Clear the area: Begin by clearing the designated area of any debris, vegetation, or flammable materials that could pose a fire hazard. Ensure there is a safe distance from any structures or overhanging trees.
- Mark the area: Use stakes and string to mark the perimeter of the fire pit. This will help you visualize the size and shape of the pit and ensure it aligns with your desired design.
- Level the ground: Work on leveling the ground within the marked area. Use a shovel and a rake to remove any unevenness and create a flat surface. This will provide a stable foundation for your fire pit.
- Add a layer of gravel: Once the ground is level, spread a layer of gravel about 2-3 inches thick across the entire area. The gravel will help with drainage and prevent the fire pit from sinking into the ground over time.
Remember, safety is paramount when it comes to building a fire pit. Ensure there is proper airflow around the pit and keep it away from any flammable objects or structures. Always check your local regulations and follow any guidelines or permits required for fire pit construction.
Quote:
“Proper preparation is the foundation of a safe and beautiful fire pit. Take your time to clear the area and create a sturdy base. It will make all the difference in the long run.” – Mark Johnson, Outdoor Living Expert
Now that you’ve prepared the fire pit area, you’re ready to move on to the next step: creating the base for your fire pit. Stay tuned for our step-by-step guide in the next section!
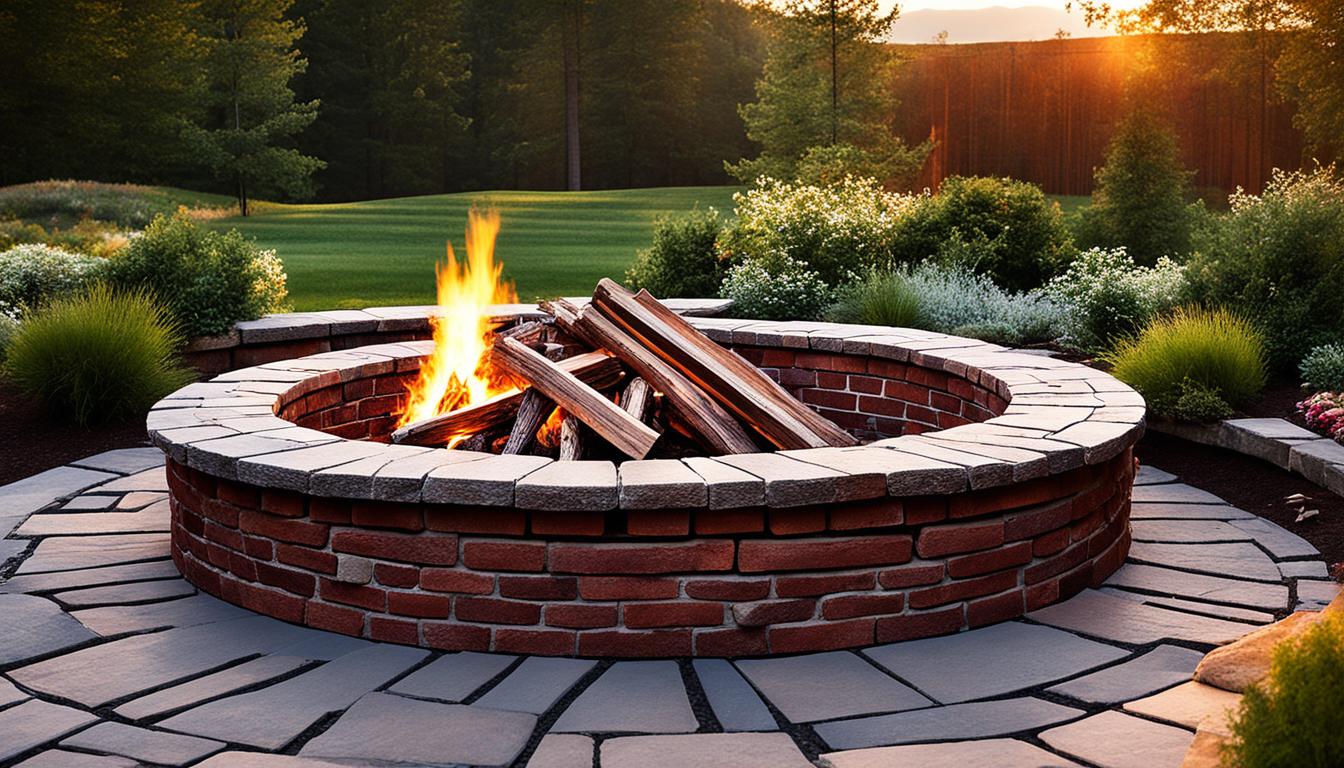
Creating the Base for Your Fire Pit
The base of your fire pit plays a crucial role in ensuring its stability and longevity. By following our step-by-step guide, you can create a solid foundation using rocks, guaranteeing that your fire pit remains safe and functional for years to come.

Here’s how you can create the base for your fire pit with rocks:
- Prepare the area: Begin by clearing the designated area for your fire pit. Remove any vegetation, debris, or flammable materials to create a safe space.
- Mark the perimeter: Use stakes and string to outline the shape and size of your fire pit. This will help you visualize the area and ensure accuracy during construction.
- Excavate the area: Dig a shallow pit within the marked perimeter. This pit should be deep enough to accommodate the base and provide stability.
- Add a layer of gravel: Fill the excavated pit with a layer of gravel. This will aid in drainage and prevent the accumulation of water, which can damage the base over time.
- Compact the gravel: Use a tamper or the back of a shovel to compact the gravel layer. This will create a firm and stable base for your fire pit.
- Arrange the bottom row of rocks: Start placing the rocks along the perimeter of the pit, ensuring a tight and secure fit. This bottom row will serve as the foundation for the rest of the fire pit walls.
- Check for level: Use a level to ensure that the rocks are aligned and the base is even. Adjust as necessary to maintain a balanced and stable structure.
By following these steps, you can create a strong and sturdy base for your fire pit using rocks. This foundation will provide the necessary support for the rest of the construction process, allowing you to enjoy cozy evenings around your easy DIY fire pit.
Building the Wall of the Fire Pit
Constructing the walls of your fire pit with rocks allows you to unleash your creativity and achieve a unique design. By arranging the rocks in different patterns and sizes, you can create a fire pit that not only serves its purpose but also becomes an eye-catching focal point in your outdoor space.
Here is a step-by-step guide on building the wall of your fire pit:
- Prepare the foundation:
Before stacking the rocks, ensure that your fire pit has a solid foundation. This will provide stability and prevent the rocks from shifting over time. Use a shovel to create a level surface and compact the soil or sand. - Select the right rocks:
Look for rocks that are durable and heat-resistant. Natural stones, such as granite or sandstone, are excellent choices. Ensure that the rocks have flat surfaces, which will make it easier to stack them securely. - Arrange the first layer:
Start by placing the largest rocks on the foundation as the base layer. Make sure they are tightly fitted together and level. This will provide stability and support for the upper layers. - Build subsequent layers:
As you move upward, gradually decrease the size of the rocks. This will create a tapered effect and give your fire pit a visually appealing shape. Use smaller rocks or pebbles to fill any gaps between the larger rocks. - Add a finishing touch:
To give your fire pit a polished look, consider using decorative stones or bricks to cap the top layer. This will not only enhance the aesthetics but also provide a smooth surface for seating.
Ready to get creative? Here are some design ideas to inspire you:
1. Natural stone mosaic: Arrange rocks of different colors and textures to create a mosaic-like pattern on the walls of your fire pit. This design adds a touch of elegance and sophistication to your outdoor space.
2. Stacked stone column: Instead of a traditional circular fire pit, construct a tall column using stacked stones. This design creates a dramatic focal point and allows the flames to rise higher, providing better visibility and warmth.
3. Triangular wall formation: Arrange the rocks in a triangular pattern, with each corner forming a wall. This unique design not only adds visual interest but also creates a cozy nook for gathering around the fire.
Remember to maintain proper ventilation by leaving small gaps between the rocks to allow air to circulate. This will ensure that your fire pit burns efficiently and produces less smoke.
Now you have the knowledge and inspiration to build the walls of your fire pit creatively. With the right combination of rocks and a well-thought-out design, your fire pit will become a stunning feature in your outdoor space.

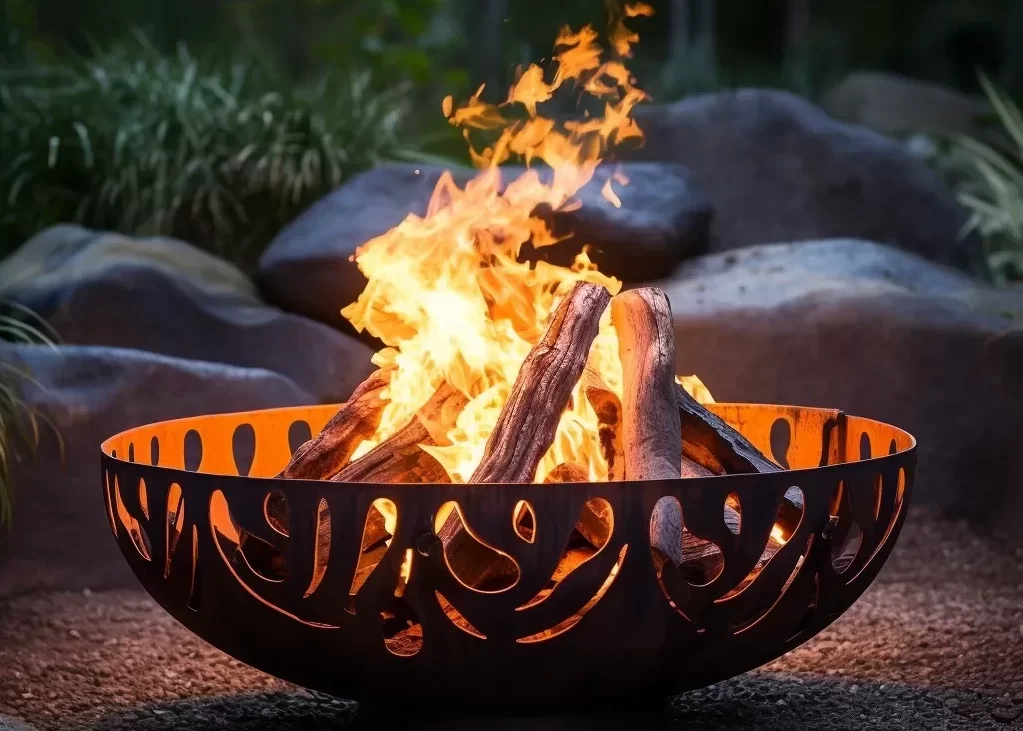
Fire Pit Safety Measures
Safety should always be a top priority when building and using a fire pit. By following these essential safety measures, you can ensure that you and your loved ones can enjoy cozy evenings by your rustic fire pit with rocks:
- Choose a suitable location: Select a well-ventilated area away from any flammable materials such as trees, low-hanging branches, or dry grass.
- Clear the area: Remove any debris, leaves, or flammable objects from the vicinity of the fire pit.
- Use a fire pit ring or liner: Install a fire pit ring or liner to provide a barrier between the flames and the surrounding rocks. This will help prevent the rocks from cracking or exploding due to the intense heat.
- Keep a safe distance: Maintain a safe distance of at least 10 feet between the fire pit and any structures, furniture, or plants.
- Never leave a fire unattended: Always supervise the fire pit when it is lit and never leave it unattended. Ensure that children and pets are kept at a safe distance.
- Extinguish the fire properly: Before leaving the fire pit area, thoroughly extinguish the flames using water or sand. Stir the ashes to ensure that there are no hot embers remaining.
- Keep a fire extinguisher nearby: Have a fire extinguisher or a bucket of water readily available in case of emergencies.
- Practice responsible firewood usage: Only use seasoned hardwoods as firewood and avoid burning treated or painted wood, as they can release toxic fumes.
By following these safety measures, you can enjoy the warmth and ambiance of your fire pit with peace of mind. Remember to always prioritize safety and take necessary precautions to protect yourself and your surroundings.
Image:
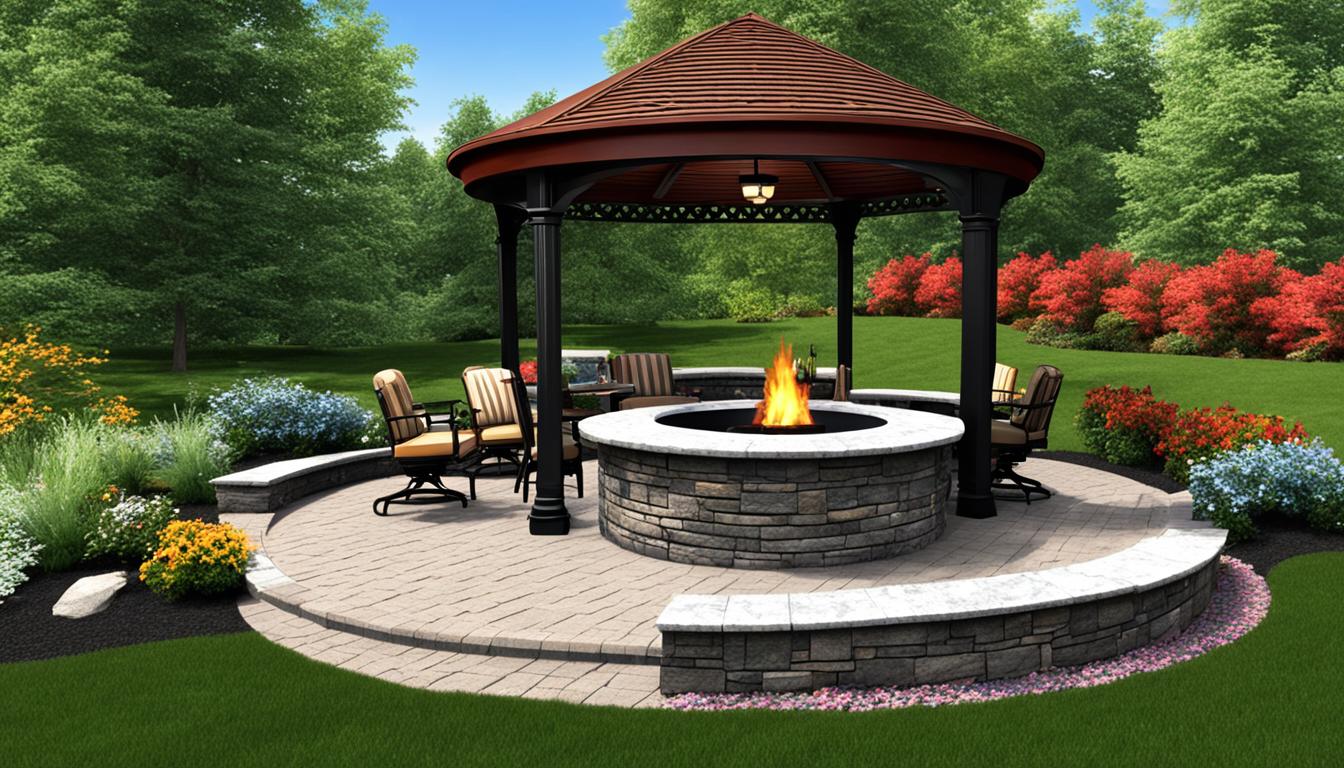
Enhancing Your Fire Pit with Additional Features
Once you’ve built your fire pit with rocks, it’s time to add some creative features and elements to make it truly unique. By incorporating these enhancements, you can elevate both the functionality and aesthetics of your fire pit area. Let’s explore some creative fire pit designs using rocks:
1. Fire Pit Seating
Make your fire pit area more inviting and comfortable by adding seating options. Consider using large, flat rocks as natural seating or even build stone benches around the fire pit. This will not only provide a place for your guests to relax but also enhance the overall ambiance of the space.
2. Rock Pathways
Create a charming entrance to your fire pit area by constructing rock pathways. Use various sizes and shapes of rocks to design a pathway that complements the surrounding landscape. This not only adds visual interest but also prevents dirt and grass from being trampled on.
3. Cooking Features
Add versatility to your fire pit by incorporating cooking features. Use rocks to build a grill grate or a metal fire pit ring with a removable grate for convenient outdoor cooking. This allows you to enjoy delicious meals while enjoying the warmth of the fire.
4. Fire Pit Lighting
Enhance the ambiance of your fire pit area by incorporating lighting elements. Strategically place small rocks with built-in LED lights around the perimeter of the fire pit or use hanging lanterns on nearby trees or posts. This will create a cozy and magical atmosphere for evening gatherings.
5. Water Features
For a truly unique fire pit area, consider adding a water feature. Use rocks to create a small pond or fountain near the fire pit, offering a soothing and tranquil element to your outdoor space. The combination of fire and water will create a captivating focal point.
By incorporating these additional features, you can transform your fire pit into a stunning centerpiece for your outdoor living area. Let your creativity flow and experiment with different ideas that suit your personal style and preferences. With rocks as your medium, the possibilities are endless.
Maintaining and Cleaning Your Fire Pit
Like any outdoor feature, regular maintenance and cleaning are essential to keep your fire pit in optimum condition and preserve the natural stone elements. Follow our step-by-step guide to ensure your fire pit remains functional and aesthetically pleasing for years to come.
Maintenance Tips:
- After each use, allow the fire pit to cool completely before cleaning.
- Remove any debris, ashes, and unburned wood from the fire pit using a small shovel or brush.
- Inspect the rocks or natural stones for any cracks or damage. If identified, consider replacing them to maintain the fire pit’s structural integrity.
- Check the fire pit’s drainage system. Ensure that it is free from any obstructions to prevent water accumulation, which can cause damage over time.
Tip: Regularly inspecting and maintaining your fire pit will help you identify and address any potential issues before they become major problems.
Cleaning Tips:
- Mix a solution of mild dish soap and warm water in a bucket.
- Using a scrub brush or sponge, gently scrub the interior and exterior surfaces of the fire pit.
- Rinse the fire pit thoroughly with clean water.
- Allow the fire pit to air dry completely before using it again.
Tip: Avoid using harsh chemical cleaners or abrasive materials that can damage the natural stone surfaces of your fire pit.
Preserving Natural Stone Elements:
To ensure the longevity and beauty of the natural stone elements in your fire pit, consider applying a sealant specifically designed for outdoor stone surfaces. This will protect the stones from weathering, moisture, and stains.
“Applying a sealant every year can significantly extend the lifespan of your fire pit and keep it looking like new.” – Fire Pit Design Expert
Remember to follow the manufacturer’s instructions when applying the sealant to achieve the best results.
Additional Tips:
- Keep a cover on your fire pit when not in use to protect it from the elements.
- Regularly trim nearby vegetation to prevent it from encroaching on the fire pit and posing a fire hazard.
- Consider adding a spark screen or fire pit guard to contain embers and reduce the risk of accidents.
By following these maintenance and cleaning tips, you can enjoy the beauty and warmth of your natural stone fire pit for many seasons to come.
Tips and Tricks for a Successful Fire Pit Project
Building a fire pit with rocks can be a rewarding and budget-friendly DIY project. To ensure your project goes smoothly, we’ve compiled a list of useful tips and tricks:
- Safety first: Before starting your project, check your local fire pit regulations and ensure you have a safe location for your fire pit.
- Choose the right rocks: Opt for rocks that can withstand high temperatures and won’t crack or explode when exposed to heat. Natural stones like granite, basalt, or lava rocks are excellent choices.
- Plan your design: Sketch out your fire pit design beforehand to visualize how it will fit into your outdoor space. Consider the size, shape, and height of the fire pit.
- Prepare the base: A solid base is crucial for the stability of your fire pit. Dig a shallow hole, add a layer of sand, and compact it firmly.
- Use a leveling tool: To ensure an even surface, use a carpenter’s level to check and adjust the base as needed.
- Arrange the rocks: Start building the walls of your fire pit by arranging the rocks in a circle or square shape. Fit them together tightly to create a sturdy structure.
- Consider airflow: Leave gaps between the rocks to allow for proper airflow, which will help your fire burn efficiently.
- Add a fire pit liner: For added protection, consider adding a fire pit liner to prevent heat damage to the rocks. This can also make cleaning easier.
- Accessorize your fire pit area: Enhance the ambiance around your fire pit by adding cozy seating, outdoor lighting, and landscaping elements.
- Maintain your fire pit: Regularly remove ash and debris from your fire pit, and clean the rocks with a mild detergent and water solution to keep them looking their best.
By following these tips and tricks, you’ll be able to create a stunning and affordable fire pit made with rocks. Now, let’s move on to adding the finishing touches to your fire pit area.
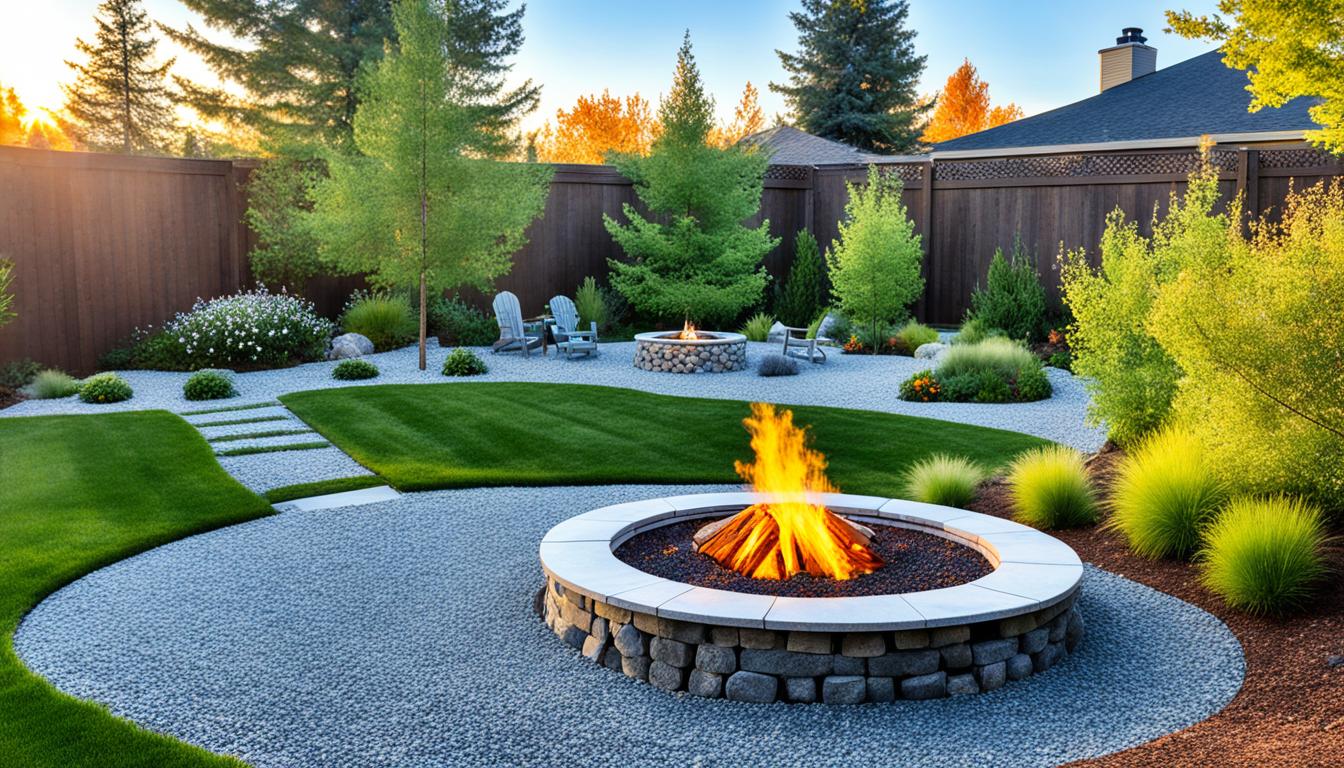
Adding the Finishing Touches to Your Fire Pit Area
Now that you’ve built your beautiful fire pit with rocks, it’s time to add those final touches that will transform your outdoor space into a cozy and inviting retreat. From landscaping ideas to seating options, we’ll help you create a picturesque fire pit area that perfectly complements your rustic fire pit with rocks.
1. Landscaping Tips
Surrounding your fire pit with the right landscaping elements can enhance its overall appeal and create a harmonious outdoor atmosphere. Consider incorporating the following rock fire pit ideas:
- Use decorative rocks or pebbles to create a border around the fire pit area, adding texture and visual interest.
- Add plants and flowers that thrive in your local climate. Choose varieties that complement the natural colors of the rocks, such as vibrant succulents or fragrant herbs.
- Integrate larger boulders strategically around the fire pit to create a natural and rustic look.
2. Seating Options
Having comfortable seating options around your fire pit is essential for creating an inviting space where friends and family can gather. Consider these rustic seating ideas:
- Arrange natural log benches around the fire pit for a truly rustic and organic seating experience.
- Opt for weather-resistant outdoor chairs made of wood or wrought iron, which can be adorned with cozy cushions and throws.
- Create a unique seating area by repurposing old tree stumps as stools or ottomans.
3. Ambient Lighting
Adding ambient lighting to your fire pit area can create a magical atmosphere, especially during evening gatherings. Here are some lighting ideas:
- Hang string lights or lanterns overhead to create a warm and cozy ambiance.
- Place solar-powered path lights around the perimeter of the fire pit area for a soft and subtle glow.
- Consider installing a fire pit with built-in lighting features that can provide both warmth and illumination.
| Landscaping Tips | Seating Options | Ambient Lighting |
|---|---|---|
| Use decorative rocks or pebbles | Natural log benches | Hang string lights or lanterns |
| Add plants and flowers | Outdoor chairs made of wood or wrought iron | Place solar-powered path lights |
| Integrate larger boulders | Tree stumps as stools or ottomans | Consider installing a fire pit with built-in lighting |
By incorporating these finishing touches, your fire pit area will become the perfect outdoor retreat where you can relax, entertain, and enjoy the mesmerizing warmth of a flickering fire. So, get creative with your rock fire pit ideas and let your imagination soar!
Remember to always prioritize safety and follow local fire pit regulations when enjoying your fire pit area.
Conclusion
Building a fire pit with rocks is a fantastic and cost-effective way to transform your outdoor space. By following our step-by-step guide and incorporating our helpful tips, you can create a stunning and functional fire pit that will add warmth and ambiance to your backyard.
Whether you’re looking for a budget-friendly DIY project or want to enhance your outdoor entertaining area, a fire pit made with rocks is a great choice. Not only does it provide a cozy gathering spot for family and friends, but it also adds a rustic charm to your backyard.
So why wait? Start your fire pit project today and enjoy memorable evenings spent around the crackling fire. With our guide as your reference, you’ll have all the information you need to create a beautiful fire pit that will be the perfect addition to your outdoor living space. Get ready to create lasting memories and experience the joy of outdoor fires!