Imagine this: it’s a beautiful summer evening, the air is filled with the scent of barbecue, and you’re gathered around your Solo Stove, enjoying the warm glow and crackling sounds of a roaring fire. But as the night comes to an end, you’re left with the daunting task of cleaning up. The thought of scrubbing away soot and ash might make you hesitate, but fear not! Cleaning your Solo Stove doesn’t have to be a chore. With a few simple tips and tricks, you can keep your Solo Stove looking pristine and performing at its best.
Key Takeaways:
Regular cleaning is essential for maintaining the performance and longevity of your Solo Stove.
Understanding the unique design and technology of your Solo Stove can help you clean it more efficiently.
Using the right cleaning products and tools is crucial for preserving the stainless steel components of your Solo Stove.
Ash removal and proper cooling-down processes are necessary before cleaning your Solo Stove.
Stubborn residue can be tackled with specific cleaning techniques and natural cleaning agents.
Understanding Your Solo Stove’s Unique Design
Solo Stove is renowned for its innovative and unique design, which sets it apart from traditional camping stoves. The Solo Stove features a double-wall construction, carefully engineered to optimize airflow and maximize combustion efficiency. The interior wall draws in oxygen through strategically placed vents, while the outer wall allows heated air to circulate, providing a secondary combustion process. This exceptional design ensures a clean and efficient burn, resulting in minimal smoke and maximum heat output.
The Solo Stove’s engineering excellence extends beyond its robust construction. The stove’s compact size and lightweight design make it ideal for camping, backpacking, and other outdoor activities. Its minimalist and user-friendly design eliminates the need for complex assembly or external fuel sources. With a Solo Stove, you can enjoy a hassle-free cooking experience wherever your adventures take you.
The Efficiency of Solo Stove Airflow Technology
Central to the Solo Stove’s exceptional performance is its cutting-edge airflow technology. The engineered vents on the stove’s base allow for efficient oxygen entry, while the top vents facilitate the smooth exit of combustion byproducts. This strategic airflow design supports a more complete burn, minimizing smoke and reducing the amount of leftover ash. The enhanced airflow promotes a hotter fire and faster boiling times, ensuring efficient fuel utilization and minimal environmental impact.
The Importance of Regular Solo Stove Maintenance
Maintaining your Solo Stove is crucial for its longevity and optimal performance. Regular cleaning and maintenance help prevent the buildup of debris, ash, and soot, which can hinder airflow and reduce the stove’s efficiency. By incorporating a simple maintenance routine, you can ensure that your Solo Stove continues to provide reliable and enjoyable outdoor cooking experiences for years to come. Additionally, proper maintenance helps preserve the stove’s appearance and keeps it looking as good as new, enhancing your overall outdoor experience.
Maintaining Stainless Steel for Longevity
Stainless steel is a key component of your Solo Stove, and proper maintenance is essential for ensuring its longevity. By following a few simple tips, you can keep your stainless steel Solo Stove looking and performing its best for years to come.
Avoiding Harsh Chemicals on Your Solo Stove
When cleaning your Solo Stove, it’s crucial to avoid using harsh chemicals that can damage the stainless steel surface. Instead, opt for gentle cleaning solutions that are specifically designed for stainless steel. These cleaning products are formulated to effectively remove dirt and grime without causing any harm.
Selecting Appropriate Cleaning Tools
Choosing the right cleaning tools is equally important when it comes to maintaining the stainless steel of your Solo Stove. Avoid using abrasive scrub brushes or steel wool that can scratch and compromise the surface. Instead, opt for soft-bristled brushes or microfiber cloths that are gentle yet effective in removing residue and ensuring a pristine shine.
Cleaning Method
Recommended Tools
Vent Cleaning
Soft-bristled brush
Exterior Cleaning
Microfiber cloth
Ash Removal
Ash shovel
Burn Chamber Cleaning
Stainless steel or nylon brush
By selecting appropriate cleaning tools, you can effectively maintain the stainless steel components of your Solo Stove without causing any damage or scratches.
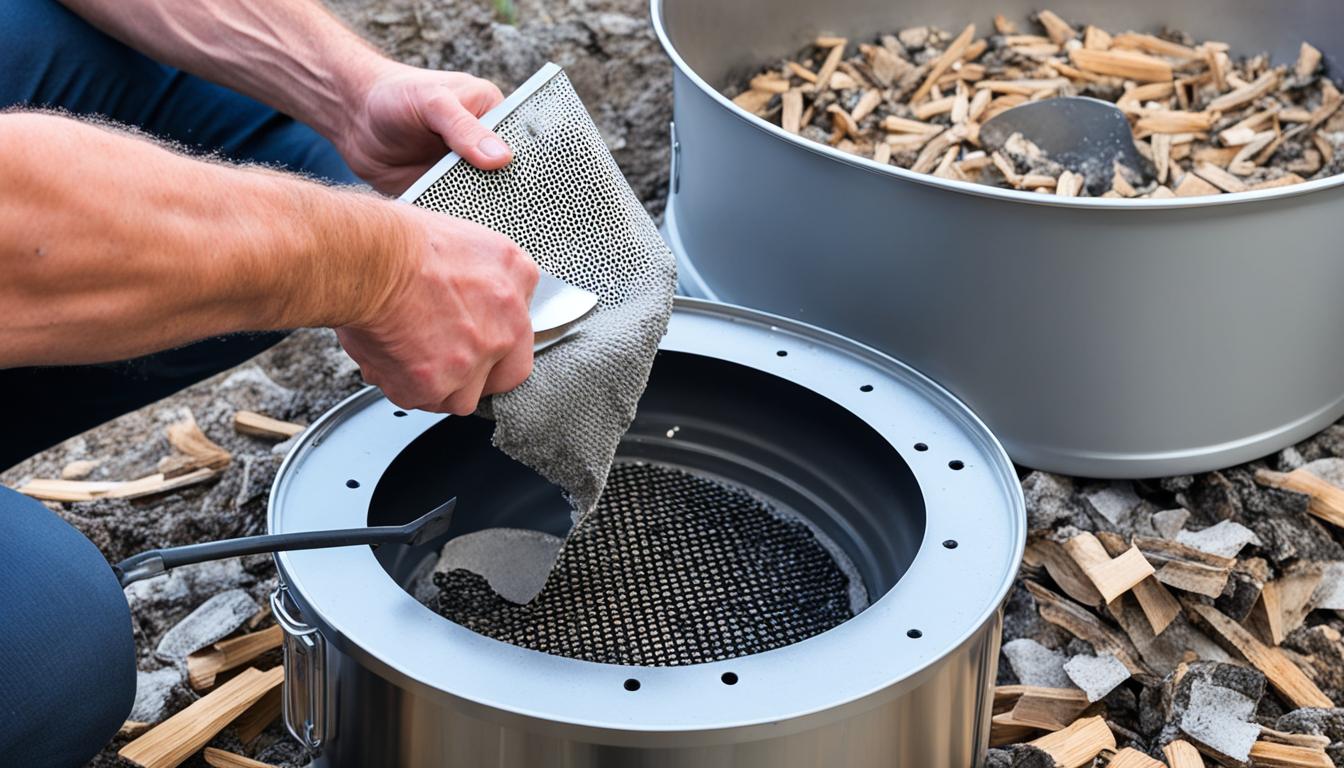
How to Clean Solo Stove After Use
Step-by-Step Ash Removal Process
Properly removing the ash from your Solo Stove is a crucial step in keeping it clean and ready for future use. Follow these steps to ensure thorough ash removal:
Allow the Solo Stove to cool down completely after use. This is essential for your safety and prevents any accidental burns.
Using a heat-resistant tool such as a shovel or tongs, carefully scoop out the cooled ashes from the fire pit. Make sure to remove all loose debris and ash residue.
Dispose of the ash in a designated outdoor waste container or compost pile. Avoid disposing of it in areas prone to fire or where it may cause damage.
After removing the ashes, use a brush or cloth to wipe down the interior and exterior surfaces of the Solo Stove, removing any remaining particles or residue.
Inspect the stove for any signs of damage or wear. Address any issues or concerns before the next use.
Pro Tip: To make ash removal even easier, consider lining the fire pit with aluminum foil or using a disposable ash pan. This saves time and makes disposal more convenient.
Cooling Down Before Cleaning
Always allow your Solo Stove to cool down completely before attempting to clean it. The intense heat generated during use can cause burns if not handled with care. It is recommended to wait at least one hour after extinguishing the fire to ensure the stove is cool enough to touch.
By following these steps and allowing your Solo Stove to cool down before cleaning, you can ensure a safe and effective cleaning process after each use. Regular maintenance and care will help extend the lifespan of your Solo Stove and keep it performing at its best.
Solo Stove Cleaning Techniques for Stubborn Residue
In order to keep your Solo Stove performing at its best, it’s essential to remove stubborn residue that may accumulate over time. This section will provide you with effective cleaning techniques to tackle tough stains and soot on your Solo Stove.
Identifying and Addressing Soot and Stains
Before diving into the cleaning process, it’s important to identify the types of stains and soot present on your Solo Stove. This will help you choose the most suitable cleaning technique. Here are some common types of residue you may encounter:
Soot: Soot is a black, powdery substance that is often left behind after burning wood. It can accumulate on the interior and exterior surfaces of your Solo Stove.
Stains: Stains can occur due to various factors, such as rust, food particles, or other contaminants. They may affect the appearance of your Solo Stove and require special attention for removal.
Once you have identified the type of residue, follow these steps to address soot and stains:
Start by wearing protective gloves and using a soft-bristle brush or sponge to gently scrub the affected areas.
If dealing with persistent soot or stains, consider using a specialized cleaning agent specifically formulated for removing residue from stainless steel.
Apply the cleaning agent according to the manufacturer’s instructions and let it sit for a few minutes to penetrate the residue.
Scrub the affected areas again, paying extra attention to stubborn spots.
Rinse the Solo Stove thoroughly with clean water to remove any cleaning residue.
Dry the stove with a soft cloth to prevent water spots or streaks.
By following these steps, you can effectively address soot and stains, restoring the pristine appearance of your Solo Stove.
Natural Cleaning Agents for a Spotless Finish
If you prefer to use natural cleaning agents, there are several options that can effectively remove stubborn residue from your Solo Stove. Here are a few natural cleaning agents to consider:
Natural Cleaning Agent
Usage
Vinegar
Mix equal parts vinegar and water, then apply to the affected areas. Let it sit for a few minutes before scrubbing and rinsing.
Baking Soda
Create a paste by mixing baking soda with water. Apply the paste to the stains or soot, scrub gently, and rinse.
Lemon Juice
Dilute lemon juice with water and apply it to the residue. Let it sit for a few minutes, scrub, and rinse thoroughly.
These natural cleaning agents are gentle yet effective in removing stubborn residue from your Solo Stove. However, always perform a patch test on a small, inconspicuous area before applying the cleaning agent to the entire surface.
Now that you are equipped with Solo Stove cleaning techniques for stubborn residue, you can confidently maintain your stove’s optimal performance and appearance.
How to Clean Ash Out of Solo Stove Models
When using your Solo Stove, ash buildup is inevitable. Proper cleaning and ash disposal are essential for maintaining the performance and longevity of your stove. This section provides detailed instructions on how to clean ash out of different Solo Stove models, along with efficient ash disposal methods.
Tips for Removing Ash from Mesa and Camp Stove Models
Cleaning ash out of Mesa and Camp Stove models requires specific techniques to ensure a thorough job. Follow these tips:
Allow the stove to cool down completely before attempting to remove the ash.
Gently remove the cooking ring and grate, if applicable, to access the ash tray beneath.
Empty the ash tray into a heat-resistant container or directly into a disposal bag.
Use a soft-bristle brush or a vacuum cleaner with a brush attachment to sweep away any remaining ash from the stove’s interior.
Clean the cooking ring and grate separately using mild soap and water, making sure to remove any ash residue.
Once everything is clean and dry, reassemble the stove.
By following these tips, you can efficiently remove ash from your Mesa and Camp Stove models, ensuring optimal performance for your next outdoor adventure.
Efficient Ash Disposal Methods
Proper ash disposal is important to prevent accidental fires and protect the environment. Consider the following methods:
Place the cooled ash in a metal container with a tight-fitting lid.
Store the container in a safe and well-ventilated area away from combustible materials.
Alternatively, dispose of the ash in a designated ash disposal site provided by your local waste management facility.
Remember to never dispose of ash in paper bags, plastic containers, or near flammable substances.
By adhering to these efficient ash disposal methods, you can safely and responsibly manage the ash from your Solo Stove, promoting a clean and hazard-free outdoor environment.
Protecting Solo Stove from Rust and Corrosion
In order to ensure the longevity of your Solo Stove and prevent rust and corrosion, it is essential to take proactive measures. By using covers that shield the stove from the elements and implementing preventative measures, you can effectively protect your Solo Stove from damage.
Using Covers to Shield from The Elements
One of the most effective ways to protect your Solo Stove from rust and corrosion is by using covers specifically designed for this purpose. These covers act as a barrier against moisture, dirt, and other elements that can cause damage to the stove.
Preventative Measures for Rust Prevention
In addition to using covers, there are other preventative measures you can take to prevent rust and corrosion on your Solo Stove:
Regular Cleaning: Keep your Solo Stove clean and free from debris. Regularly remove ashes and wipe down the exterior to prevent the accumulation of moisture.
Apply High-Temperature Paint: Consider applying a heat-resistant paint designed for metal surfaces to provide an additional layer of protection against rust.
Store Indoors: When not in use, store your Solo Stove indoors or in a dry area to minimize exposure to moisture.
Use Rust Inhibitors: Apply a rust inhibitor or protective coating to vulnerable areas of the stove to prevent rust formation.
Inspect Regularly: Conduct regular inspections to identify any signs of rust or corrosion. Address any issues promptly to prevent further damage.
By implementing these preventative measures and using covers designed for Solo Stoves, you can effectively protect your stove from rust and corrosion, ensuring its longevity and optimal performance.
Best Practices for Solo Stove Cleaning
Proper cleaning and maintenance are essential for keeping your Solo Stove in pristine condition. By following these best practices, you can ensure that your Solo Stove performs optimally and lasts for years to come.
Creating a Regular Cleaning Routine
To maintain the efficiency and longevity of your Solo Stove, it’s important to establish a regular cleaning routine. Here are some tips to help you develop a cleaning schedule:
After each use, remove any ash or debris from the stove.
Perform a thorough cleaning at least once a month, or more frequently if you use your Solo Stove frequently.
Inspect the stove regularly for any signs of damage or wear and address them promptly.
Refer to the manufacturer’s guidelines for specific cleaning instructions for your Solo Stove model.
Safe Storage Solutions Post-Cleaning
After cleaning your Solo Stove, it’s crucial to store it properly to prevent damage and ensure its longevity. Here are some safe storage solutions:
Allow the stove to cool completely before storing it.
Cover the stove with a protective cover to shield it from the elements and prevent rust.
Store the Solo Stove in a dry, well-ventilated area to avoid moisture buildup.
If possible, store the stove in its original packaging or a dedicated storage bag to provide additional protection.
Best Practices for Solo Stove Cleaning
Regular Cleaning Routine
Safe Storage Solutions
Establish a regular cleaning routine to maintain stove efficiency and longevity.
Remove ash and debris after each use. Perform a thorough cleaning at least once a month.
Allow the stove to cool completely before storing. Use a protective cover and store in a dry area.
Advanced Cleaning: Taking Care of Difficult Spots
When it comes to Solo Stove maintenance, addressing difficult spots requires advanced cleaning techniques. In this section, we’ll explore effective methods to tackle rust spots and provide specific instructions for cleaning the Yukon and Bonfire models.
Addressing Rust Spots on Solo Stove
Rust spots can be a common issue with Solo Stoves, but they can be easily addressed with the right approach. To remove rust spots, start by scrubbing the affected areas with a mixture of mild dish soap and warm water. Using a non-abrasive sponge or cloth, gently scrub the surface until the rust spots are no longer visible. Rinse thoroughly and dry the stove completely before using it again.
If the rust spots persist, you can try using a rust remover specifically designed for stainless steel. Apply the rust remover according to the manufacturer’s instructions, ensuring that you cover the affected areas completely. After the recommended duration, scrub the surface again with the mild dish soap mixture to remove any remaining rust residue. Rinse and dry the stove thoroughly before using.
Regular maintenance and proper storage can help prevent rust spots from appearing on your Solo Stove. Always clean and dry the stove after each use, and consider using a cover to protect it from moisture and other elements when not in use. These preventative measures can significantly reduce the likelihood of rust formation.
Cleaning Solo Stove Yukon and Bonfire Models
The Solo Stove Yukon and Bonfire models require special attention when it comes to cleaning. To clean the exterior of these larger models, use a mild dish soap mixture and warm water. Gently scrub the surface with a non-abrasive sponge or cloth, ensuring you cover the entire exterior. Rinse thoroughly and dry the stove completely before storing or using it again.
For the interior of the Yukon and Bonfire models, start by removing the fire ring and fire pit. Empty any ash and debris from the fire pit and wipe it clean using a soft cloth or brush. To reach into the corners and crevices, you can use a small, soft-bristle brush. Once the fire pit is clean, reassemble the stove and follow the exterior cleaning instructions mentioned above.
Regularly cleaning your Yukon and Bonfire models will ensure optimal performance and longevity. Make it a habit to clean and maintain these larger stoves after each use to prevent the buildup of ash and residue.
Implementing Solo Stove Maintenance Hacks
Keeping your Solo Stove clean and well-maintained is essential for optimal performance and longevity. In this section, we’ll share some handy maintenance hacks that will make your cleaning routine a breeze. These quick fixes for common cleaning challenges will save you time and effort, while also ensuring that your fire pit stays in top shape.
Quick Fixes for Common Cleaning Challenges
Sometimes, despite our best efforts, cleaning our Solo Stove can present some challenges. But fear not, because we have some quick fixes that will help you tackle those stubborn cleaning tasks:
Use a wire brush or grill scraper to remove built-up residue from the stove’s interior.
For tough stains or burnt-on food, create a paste using baking soda and water. Apply the paste to the affected area and let it sit for a few minutes before scrubbing with a bristle brush.
To remove rust spots, gently rub the affected area with steel wool or a mixture of vinegar and salt.
Clean the stove’s vents and airflow holes with a small brush or pipe cleaner to ensure proper airflow.
These simple yet effective solutions will help you overcome common cleaning challenges and keep your Solo Stove looking and performing its best.
DIY Cleaning Solutions for Your Fire Pit
When it comes to cleaning your Solo Stove, you don’t always need to rely on store-bought cleaning products. You can create DIY cleaning solutions using ingredients you already have at home. Here are a few ideas:
Mix equal parts vinegar and water to create a natural cleaning spray.
Combine baking soda and water to create a paste for removing tough stains.
For a deep clean, fill a bucket with warm water and add a few tablespoons of dish soap. Soak the stove’s components in the soapy water and scrub away dirt and grime.
These DIY cleaning solutions are not only effective but also budget-friendly. By utilizing these homemade remedies, you can maintain your Solo Stove without breaking the bank.
Now that you have some maintenance hacks up your sleeve and DIY cleaning solutions in your toolkit, you’ll be able to conquer any cleaning challenge that comes your way. A well-maintained Solo Stove not only ensures a safer and more efficient fire, but it also enhances your overall outdoor experience.
How to Clean Solo Stove Exterior for Aesthetics
In addition to ensuring the optimal performance of your Solo Stove, it’s important to keep the exterior clean and well-maintained for a visually appealing experience. The outer shine of your Solo Stove not only contributes to its overall aesthetics but also enhances the ambiance of your outdoor space. By following these cleaning tips and utilizing the right tools, you can preserve the shine and appeal of your Solo Stove.
Preserving the Outer Shine of Your Solo Stove
To maintain the outer shine of your Solo Stove, regular cleaning is essential. Start by wiping down the exterior with a soft cloth or sponge using warm, soapy water. This will remove any dirt, grime, or residue that has accumulated on the surface. Avoid using abrasive cleaners or harsh chemicals as they can damage the finish of your Solo Stove. Once the stove is clean, rinse it thoroughly with water and dry it with a clean cloth to prevent water spots.
Tools and Tips for External Cleanliness
Here are some tools and tips you can use to ensure the external cleanliness of your Solo Stove:
Soft cloth or sponge: Use a gentle cloth or sponge to wipe away any dirt or debris from the exterior surface.
Mild soap: Use a mild soap, such as dish soap, mixed with warm water to clean the stove. Avoid harsh chemicals that can damage the finish.
Non-abrasive scrub brush: If there are stubborn stains or residue, you can use a non-abrasive scrub brush to gently scrub the surface. Be careful not to apply too much pressure to prevent scratching.
Stainless steel cleaner: For stainless steel Solo Stoves, you can use a stainless steel cleaner specifically designed for outdoor appliances. Follow the manufacturer’s instructions for best results.
Protective cover: When not in use, consider using a protective cover to shield your Solo Stove from dust, dirt, and harsh weather conditions. This can help maintain its shine and extend its lifespan.
By incorporating these tools and tips into your cleaning routine, you can ensure the exterior of your Solo Stove stays clean, shiny, and appealing, enhancing your overall outdoor experience.
Easy Solo Stove Cleaning: A User-Friendly Guide
Simple and Efficient Methods for the Occasional User
Cleaning your Solo Stove doesn’t have to be a daunting task. With these simple and efficient methods, even occasional users can keep their stoves in great condition. Whether you’re preparing for a solo camping trip or a backyard barbecue with friends, following these easy cleaning steps will ensure your Solo Stove is always ready for use.
To get started, gather the necessary tools:
Soft-bristle brush
Mild dish soap
Microfiber cloth
Water
Now, let’s dive into the cleaning process:
Remove ashes: Allow your Solo Stove to cool completely before attempting to clean. Once the stove is cool, carefully remove the ashes using a soft-bristle brush. Be sure to dispose of the ashes in a safe and appropriate manner.
Clean the exterior: Use a microfiber cloth dampened with mild dish soap and water to gently clean the exterior of your Solo Stove. Wipe away any dirt, grime, or residue to restore its shine and remove surface stains.
Scrub the interior: Use the same microfiber cloth or a soft-bristle brush to clean the interior of the stove. Pay special attention to the areas with soot or stubborn stains. Gently scrub the affected areas until clean.
Rinse and dry: Once you’ve thoroughly cleaned the interior and exterior of your Solo Stove, rinse off any remaining soap residue with water. Use a clean, dry microfiber cloth to dry the stove completely, ensuring no moisture is left behind.
Ensuring Your Solo Stove is Guest-Ready
When you have guests over, it’s essential to make sure your Solo Stove is not only clean but also presentable. Follow these additional steps to ensure your Solo Stove is guest-ready:
Polish the exterior: After cleaning, polish the exterior of your Solo Stove with a designated stainless steel cleaner. This will help maintain its shine and leave a protective layer against future stains.
Arrange seating and accessories: Set up comfortable seating around your Solo Stove, ensuring guests have easy access to the fire. Place accessories such as firewood, roasting sticks, and cozy blankets nearby to create a welcoming and enjoyable ambiance.
By following this user-friendly guide, you can easily clean your Solo Stove and ensure it is always guest-ready. Remember to schedule regular cleaning sessions to prevent excessive buildup and maintain the longevity of your Solo Stove for years to come.
Effective Solo Stove Cleaning Methods for Persistent Issues
This section provides effective cleaning methods for persistent cleaning issues with a Solo Stove. Whether you’re dealing with stubborn residue, rust spots, or other challenging cleaning scenarios, these methods will help you overcome common cleaning obstacles. Additionally, we’ll provide you with a comprehensive Solo Stove cleaning tutorial for in-depth maintenance.
Overcoming Common Cleaning Obstacles
Cleaning a Solo Stove can sometimes present certain challenges. However, with the right approach, you can overcome these obstacles and achieve a clean and well-maintained stove. Here are some tips:
Use natural cleaning agents such as vinegar and baking soda to tackle tough stains and soot buildup.
Scrub gently with a non-abrasive brush or sponge to avoid damaging the stove’s stainless steel surface.
Utilize specialized cleaning tools designed specifically for Solo Stove maintenance, such as chimney brushes and ash vacuums.
Solo Stove Cleaning Tutorial for In-Depth Maintenance
To ensure your Solo Stove receives thorough cleaning and maintenance, follow this step-by-step tutorial:
Begin by removing any ashes or debris from the stove’s burning chamber.
Next, wipe down the stove’s exterior using a damp cloth and mild soap. Be sure to remove any dirt or grime.
For stubborn residue or rust spots, apply a cleaning solution specifically formulated for stainless steel surfaces.
Gently scrub the affected areas using a soft brush or sponge.
Rinse the stove thoroughly with clean water to remove any cleaning residue.
By following these effective cleaning methods and strategies, you can keep your Solo Stove in optimal condition and ensure its longevity. Remember to perform regular maintenance to prevent the accumulation of stubborn stains and keep your stove looking its best.
Conclusion
In conclusion, regular cleaning is essential for maintaining the performance and longevity of your Solo Stove. By following the proper cleaning process, you can ensure that your Solo Stove remains in optimal condition for years to come.
Summarizing the Solo Stove Cleaning Process
To summarize, start by removing the ash from your Solo Stove after each use. Allow the stove to cool down completely before proceeding with the cleaning process. Use appropriate cleaning tools and natural agents to tackle soot, stains, and stubborn residue. Clean the ash out of different Solo Stove models using specific techniques for each model. Finally, take preventative measures to protect your Solo Stove from rust and corrosion.
Why Regular Cleaning Enhances Your Solo Stove Experience
Regular cleaning not only ensures the cleanliness of your Solo Stove but also enhances your overall experience with it. By cleaning your Solo Stove regularly, you can maintain its efficiency and performance, allowing it to function optimally. Additionally, a clean stove not only looks better but also promotes a healthier and safer cooking environment. By investing time in regular cleaning, you can enjoy the full benefits of your Solo Stove for years to come.
How much did you like Our detailed Blog”? Review Also, please share these Blogs with your friends on social media.
Recommended