


If you’re tired of dealing with smoky fires and want to build your own efficient solo stove, you’ve come to the right place. This DIY guide will walk you through the process of making a solo stove using simple materials and tools. Whether you’re planning a camping trip or just want a smoke-free fire pit for your backyard, this step-by-step guide will help you create a solo stove that is efficient, affordable, and easy to use.
Key Takeaways:
- Learn how to make a solo stove from simple materials and tools.
- Create an efficient and affordable solo stove for camping or backyard use.
- Follow the step-by-step guide to build a smoke-free solo stove.
- Discover the benefits of a well-built solo stove, such as maximum heat output and fuel efficiency.
- Explore other DIY solo stove projects for different needs and preferences.
Supplies and Preparation
Before you embark on the construction of your solo stove, it’s important to gather the necessary supplies. To ensure a successful build, you’ll need the following items:
- A helium or propane tank
- A steel Bain Marie Pot
- An angle grinder with cutting and flap wheels
- A drill with various drill bits
Once you have all your supplies, you can begin the preparation process. Here’s a step-by-step guide to help you get started:
- Cut a hole in the bottom: Begin by cutting a hole in the bottom of the outer container to fit the Bain Marie Pot. This will serve as the burn chamber for your solo stove.
- Drill vent holes: Next, use your drill to create vent holes in both the tank and the burn chamber. These holes are crucial for ensuring proper airflow and combustion within the stove.
Take your time during the preparation process to ensure accuracy and precision. With the right supplies and careful preparation, you’ll be well on your way to constructing your very own solo stove.
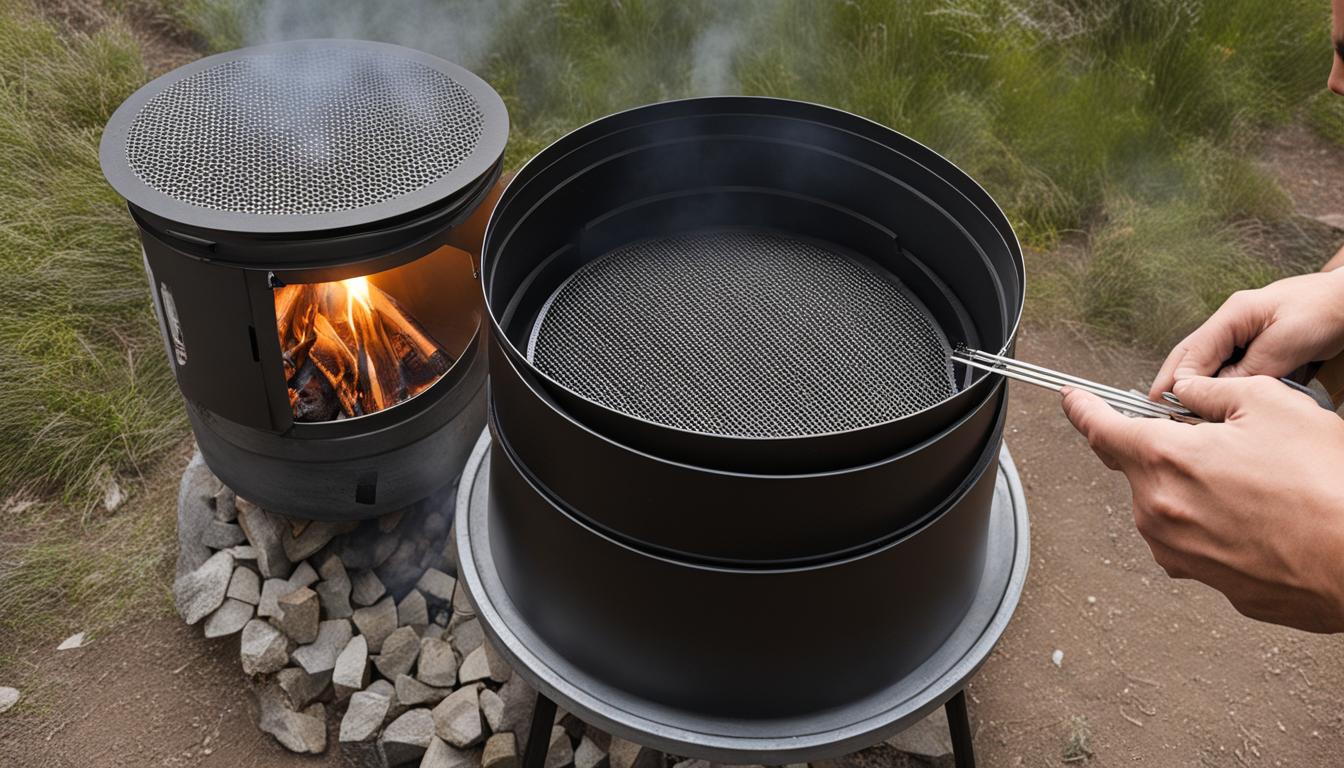
Assembling Your Solo Stove
With all the necessary preparations done, it’s time to start assembling your solo stove. Follow these simple steps to create your own efficient and smokeless fire pit.
Gather the Materials
Before you begin, make sure you have the following materials:
- Bain Marie Pot
- Helium or propane tank
- Angle grinder with cutting and flap wheels
- Drill with various drill bits
Having these supplies ready will ensure a smooth and hassle-free assembly process.
Step 1: Slide the Bain Marie Pot
Take the Bain Marie Pot and slide it into the tank until it is fully seated. Make sure that the lip of the pot seals to the tank to ensure proper airflow. This is crucial for the efficiency and functionality of your solo stove.
Step 2: Drill Vent Holes
Using the drill, create vent holes in both the tank and the burn chamber. These holes will ensure the proper flow of air, which is essential for a smokeless fire. Be careful and precise when drilling to avoid any mishaps.
Step 3: Light the Fire
Once you’ve assembled your solo stove, it’s time to start enjoying the warmth and ambiance it brings. Fill the inner chamber with thumb-sized pieces of dry wood and light the top. Remember to avoid overfeeding the fire with fresh wood to maintain a smokeless experience.
If you want to enhance the performance and reduce smoke even further, consider using a heat deflector or grate in the bottom of the burn chamber. This additional feature can help distribute heat more evenly and improve the overall efficiency of your solo stove.
Now that you’ve successfully assembled your solo stove, you’re ready to enjoy smoke-free fires in your backyard or on your camping adventures. Embrace the warmth and beauty of nature without the hassle of smoke, thanks to your homemade solo stove.
Benefits of a Solo Stove
Making your own solo stove has several benefits. First and foremost, it provides a smokeless experience, eliminating the hassle and discomfort of dealing with smoky fires. This makes it perfect for camping trips or outdoor adventures where you want to enjoy a fire without the smoke.
Additionally, a well-built solo stove can be highly efficient, maximizing heat output while minimizing fuel consumption. This makes it ideal for hiking or other activities where weight and fuel efficiency are important factors to consider.
By following the steps in this DIY guide, you can create a solo stove that meets your specific needs and preferences.
Benefits at a Glance
| Benefits |
|---|
| Smokeless Experience |
| High Efficiency |
| Ideal for Camping and Hiking |

Other DIY Solo Stove Projects
If you’re looking to explore more DIY solo stove projects, there’s no shortage of options to choose from. Whether you’re interested in mini solo stoves, wood gas stoves, rocket stoves, or even small solo stoves made from tin cans, the possibilities are endless. These projects provide an excellent opportunity to create your own solo stove using readily available supplies.
If you’re a backpacking enthusiast searching for a lightweight stove for your outdoor adventures, there are various designs and tutorials available. On the other hand, if you’re someone who enjoys hosting gatherings or camping with a larger group, building a DIY solo stove fire pit might be the perfect option. Let’s take a closer look at some of the popular DIY solo stove projects:
- Mini Solo Stoves: These compact stoves are ideal for solo camping trips or backpacking adventures. They are designed to be lightweight, easy to carry, and efficient in fuel consumption.
- Wood Gas Stoves: Wood gas stoves utilize a gasification process to burn wood more efficiently. They are known for their ability to produce a smokeless flame while maximizing heat output.
- Rocket Stoves: Rocket stoves are renowned for their efficiency and minimal fuel consumption. They are typically built using simple materials like bricks, blocks, or metal cans.
- Solo Stoves from Tin Cans: Transforming a tin can into a functional solo stove is an inexpensive and creative project. With a little bit of modification, you can create a compact and portable stove for your outdoor adventures.
No matter which DIY solo stove project you choose, these endeavors offer a budget-friendly and rewarding way to create a stove that suits your specific needs. Now, let’s take a look at a visual representation of these different options:
| DIY Solo Stove Projects | Description |
|---|---|
| Mini Solo Stoves | A compact and lightweight stove ideal for solo camping trips and backpacking adventures. |
| Wood Gas Stoves | Utilizes a gasification process to burn wood efficiently, resulting in a smokeless flame and maximum heat output. |
| Rocket Stoves | Known for their efficiency and minimal fuel consumption, often built with bricks, blocks, or metal cans. |
| Solo Stoves from Tin Cans | A creative and cost-effective project that transforms a tin can into a compact and portable solo stove. |
As you can see, there’s a DIY solo stove project out there for everyone. Whether you’re an experienced outdoor enthusiast or just starting to explore the world of solo stoves, these projects offer a fulfilling experience and a chance to enhance your camping or hiking adventures.

Now that you have a glimpse of the various DIY solo stove projects available, it’s time to get creative and start building! Remember, the journey of building your own solo stove is not only about the end result but also the satisfaction and personal touch it adds to your outdoor experiences.
Conclusion
Building your own solo stove can be a rewarding and cost-effective project. By following the steps and tips outlined in this DIY guide, you can create a solo stove that is smokeless, efficient, and perfect for your outdoor adventures. Whether you’re a seasoned camper or a backyard enthusiast, having a homemade solo stove allows you to enjoy a fire without the hassle of smoke and provides a source of heat and cooking.
By utilizing readily available supplies and investing some time and effort, you can customize your solo stove to meet your specific needs and preferences. The satisfaction of creating something with your own hands and the sense of fulfillment in using a well-built solo stove make this project truly worthwhile.
So, gather your supplies, follow the instructions, and start building your own solo stove today. Enjoy smoke-free fires, efficient heat, and the convenience of cooking outdoors. Embrace the DIY spirit and embark on this journey to create a solo stove that enhances your outdoor experiences. With a little creativity and persistence, you’ll soon have a solo stove that will be the envy of your friends and fellow campers.
How much did you like Our detailed Blog”? Review Also, please share these Blogs with your friends on social media.
Recommended