


Are you looking to add a touch of warmth and ambiance to your outdoor gatherings? Imagine cozying up to a crackling fire on your own custom-made table top fire pit. But here’s the question: Is it possible to create this inviting centerpiece yourself?
The answer is a resounding yes! In this comprehensive DIY guide, we will take you through the step-by-step process of making your very own table top fire pit. No need to break the bank or hire a professional. With a little creativity and some basic supplies, you can transform your outdoor space into a haven of relaxation and beauty.
Key Takeaways:
- Learn how to create a table top fire pit with our easy-to-follow instructions.
- Gather the necessary materials to ensure a smooth and successful project.
- Choose the right table that fits your style and preferences.
- Prepare the table for assembly, ensuring durability and longevity.
- Build the fire pit itself, including the burner, stones, and ventilation.
Materials You Will Need
Before you begin your DIY table top fire pit project, it’s important to gather all the necessary materials. Below is a comprehensive list of the items you will need to create your own table top fire pit:
| Materials | Quantity |
|---|---|
| 1. Tabletop surface or container | 1 |
| 2. Fire pit burner kit | 1 |
| 3. Fire pit stones or glass beads | As per requirement |
| 4. Propane tank or natural gas line (if required) | 1 |
| 5. Gas regulator and valve kit (if required) | 1 |
| 6. Sandpaper or sanding block | 1 |
| 7. Clear sealant or fire-resistant paint | 1 |
| 8. Safety gloves and goggles | As per requirement |
| 9. Screwdriver | 1 |
| 10. Drill and drill bits | 1 |
| 11. Measuring tape | 1 |
| 12. Lighter or ignition device | 1 |
Keep in mind that some of the listed materials may be optional, depending on your specific design and preferences. Now that you have everything you need, it’s time to move on to the next steps of creating your beautiful table top fire pit.
Choosing the Right Table
Selecting the right table for your table top fire pit design is essential to create a harmonious and functional outdoor space. With numerous options available, it’s important to consider your style, preferences, and the practicality of the table. Here, we will guide you through the process of choosing a suitable table that will enhance the beauty and functionality of your table top fire pit.
When it comes to choosing a table, you have a variety of materials and designs to consider. Some popular options include:
- Wooden Tables: These tables provide a warm and natural aesthetic, making them an excellent choice for rustic or traditional settings. Opt for a table made from durable hardwoods like teak or cedar to ensure longevity.
- Metal Tables: Metal tables offer a modern and sleek look that complements contemporary outdoor designs. Look for tables made from weather-resistant materials such as aluminum or wrought iron.
- Stone Tables: For a luxurious and timeless appeal, stone tables can be an ideal choice. Granite and marble tables are not only visually stunning but also offer excellent durability and resistance to the elements.
- Glass Tables: Glass tables create an elegant and sophisticated atmosphere, perfect for modern outdoor spaces. Consider tempered or safety glass for added durability and safety.
- Plastic or Resin Tables: If you’re looking for a budget-friendly and low-maintenance option, plastic or resin tables are worth considering. These tables are lightweight, easy to clean, and come in various styles.
Aside from the material, you should also consider the size and shape of the table. Think about the available space in your outdoor area and how you envision the fire pit fitting in. Round or square tables are versatile options that encourage conversation and a cozy atmosphere. Rectangular tables, on the other hand, provide a more formal and organized setting.
Furthermore, consider features like adjustable height, built-in storage, and additional tabletop space to accommodate drinks or snacks. These features can add convenience and functionality to your table top fire pit setup.
Remember to assess the table’s stability and weight-bearing capacity to ensure it can safely support the fire pit and other accessories. Check for sturdy construction, proper leg support, and secure joints.
By carefully considering your style, the practicality of the table, and the compatibility with your table top fire pit design, you can choose a table that not only complements your outdoor space but also creates a focal point for relaxation and entertainment.
Table Options:
| Table Type | Pros | Cons |
|---|---|---|
| Wooden Tables | – Warm and natural aesthetic – Durable hardwood options – Versatile styles |
– Requires regular maintenance – Susceptible to weather damage |
| Metal Tables | – Modern and sleek look – Weather-resistant materials – Long-lasting durability |
– Can become hot in direct sunlight – May require occasional touch-ups |
| Stone Tables | – Luxurious and timeless appeal – Excellent durability – Resistance to the elements |
– Heavier and more difficult to move – More expensive than other options |
| Glass Tables | – Elegant and sophisticated atmosphere – Easy to clean – Reflects natural light |
– Requires frequent cleaning to prevent smudges – Not suitable for heavy objects |
| Plastic or Resin Tables | – Budget-friendly option – Lightweight and easy to clean – Variety of styles |
– Less durable compared to other materials – Prone to fading over time |
Preparing the Table
Before assembling your table top fire pit, it’s important to properly prepare the table to ensure its durability and longevity. Follow these instructions to clean, sand, and seal the table for a perfect DIY fire pit experience.
Cleaning the Table
Gently clean the table surface to remove any dust, dirt, or debris. Use a mild detergent mixed with water and a soft cloth or sponge to wipe down the entire surface. Rinse the table with clean water and allow it to dry completely.
Sanding the Table
Using a fine-grit sandpaper, carefully sand the table surface. Sanding will help remove any imperfections and create a smooth surface for the fire pit. Be sure to sand in the direction of the wood grain for the best results. After sanding, wipe off any residual dust with a clean cloth.
Sealing the Table
Applying a sealant to the table will protect it from moisture and weathering, ensuring its longevity. Choose a waterproof sealant suitable for outdoor use. Using a paintbrush or sponge, evenly apply the sealant to the entire surface of the table, following the manufacturer’s instructions. Allow the sealant to dry completely before proceeding.
By following these simple steps to prepare your table, you’re on your way to creating an easy and beautiful table top fire pit. Now that your table is clean, sanded, and sealed, you’re ready to move on to the next step of building your DIY fire pit.
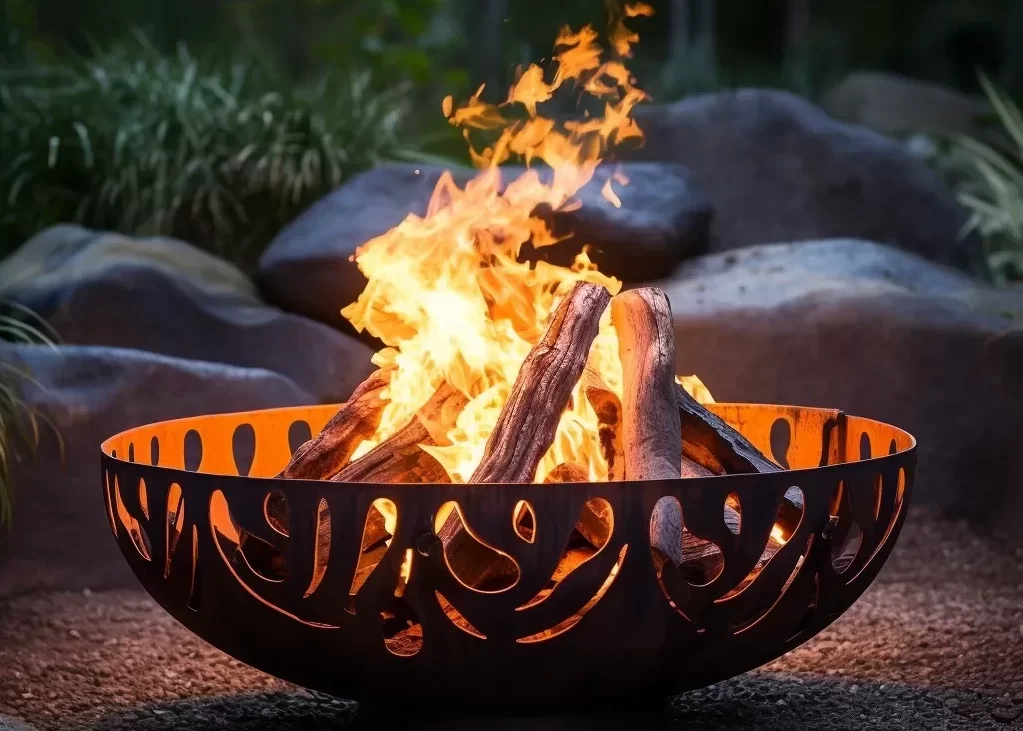
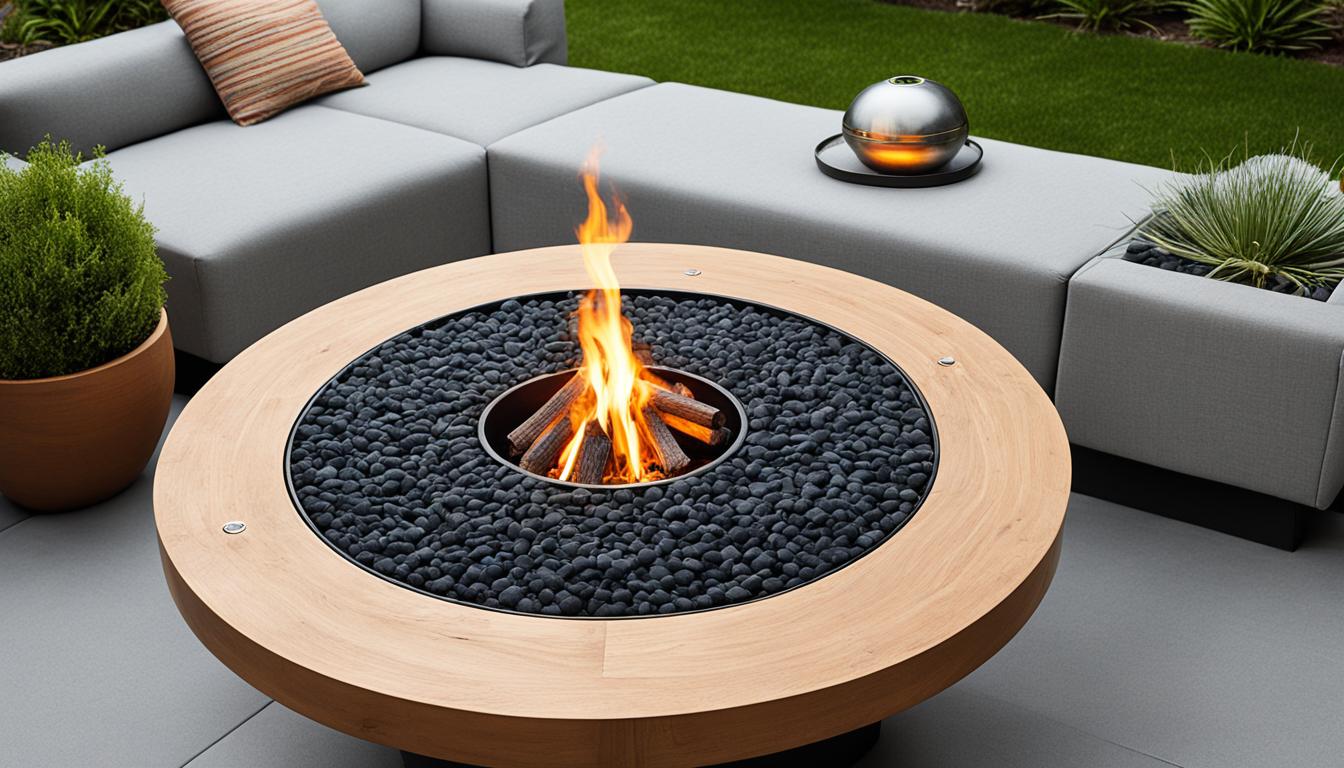
Building the Fire Pit
Now that you have prepared your table, it’s time to move on to the exciting part – building your own table top fire pit! Follow our step-by-step instructions below to create a stunning centerpiece for your outdoor space.
Gather Your Materials
Before you begin, make sure you have all the necessary materials and tools at hand. Here’s a list to help you get started:
- Rectangular metal or stainless steel tray
- Burner ring or pan
- Fire-resistant rocks or glass pebbles
- Propane tank
- Gas regulator
- Hose
- Drill
- Pipe wrench
- Sandpaper
- High-heat resistant paint (optional)
Create the Burner
Start by creating the burner for your table top fire pit. Here’s how:
- Place the rectangular metal or stainless steel tray on a flat surface.
- Using a drill, create several small holes in the bottom of the tray to allow for proper gas ventilation.
- Connect the burner ring or pan to the tray, ensuring a secure fit.
- Attach the gas regulator to the propane tank, following the manufacturer’s instructions.
- Connect the hose to the gas regulator and the burner, tightening the connections with a pipe wrench.
Arrange the Stones
Now it’s time to arrange the fire-resistant rocks or glass pebbles in your table top fire pit. Be creative and choose a design that suits your style and preferences. Remember to leave the burner uncovered to ensure proper airflow.
Ensure Proper Ventilation
Proper ventilation is essential for the safety and functionality of your table top fire pit. Make sure to maintain a sufficient gap between the rocks or pebbles to allow the flames to breathe. This will ensure a steady and controlled burn.

With these steps, you can now proudly admire your homemade table top fire pit. Light it up, sit back, and enjoy the cozy warmth and enchanting ambiance it brings to your outdoor gatherings.
Connecting the Gas Supply
If your table top fire pit requires a gas supply, it’s essential to ensure safe and proper connections. In this section, we will guide you through the process of connecting the gas supply to your fire pit, providing you with the necessary instructions and safety precautions.
Tools You Will Need:
- Gas line
- Gas regulator
- Gas valve
- Pipe wrench
- Thread seal tape
- Adjustable wrench
- Gas leak detection solution
It’s important to note that gas connections should be handled by a professional if you are unsure or uncomfortable with the process. Safety should always be a top priority.
Follow these steps to connect the gas supply to your table top fire pit:
- 1. Ensure that the gas valve on the table top fire pit is closed.
- 2. Locate the gas line connection on your fire pit, typically located at the base or side of the unit.
- 3. Wrap the threaded end of the gas line with thread seal tape to create a tight seal.
- 4. Connect the gas line to the gas valve on the fire pit, using an adjustable wrench to tighten the connection.
- 5. Once connected, use a pipe wrench to tighten the gas line onto the gas valve, ensuring a secure fit.
- 6. Apply a gas leak detection solution on the connections to check for any gas leaks. Follow the manufacturer’s instructions for proper application.
- 7. Open the gas valve on the fire pit slowly to allow gas flow.
- 8. Test the connection by spraying the gas leak detection solution on the connections. If bubbles appear, there may be a gas leak. In this case, turn off the gas valve immediately and consult a professional.
Remember, safety is paramount when working with gas connections. If you have any doubts or concerns, consult a professional to ensure a proper and secure setup.
Important Safety Precautions:
Always follow these safety precautions when connecting the gas supply to your table top fire pit:
- Work in a well-ventilated area.
- Ensure the gas supply is turned off during the connection process.
- Handle gas lines and connections with care to avoid damage.
- Take precautions to prevent gas leaks, such as using thread seal tape and conducting leak tests.
- Keep flammable materials away from the fire pit and gas connections.
- If you suspect a gas leak or smell gas, evacuate the area immediately and contact your gas provider or emergency services.
| Gas Supply Connection Steps | Safety Precautions |
|---|---|
| 1. Ensure the gas valve on the fire pit is closed. | – Work in a well-ventilated area. – Ensure the gas supply is turned off during the connection process. |
| 2. Wrap the threaded end of the gas line with thread seal tape. | – Handle gas lines and connections with care to avoid damage. – Take precautions to prevent gas leaks, such as using thread seal tape. |
| 3. Connect the gas line to the gas valve. | – Keep flammable materials away from the fire pit and gas connections. |
| 4. Tighten the gas line onto the gas valve. | – Handle gas lines and connections with care to avoid damage. |
| 5. Apply a gas leak detection solution and test for leaks. | – Take precautions to prevent gas leaks, such as conducting leak tests. – If you suspect a gas leak or smell gas, evacuate the area immediately and contact your gas provider or emergency services. |
Lighting and Testing the Fire Pit
Once you have completed the setup of your table top fire pit, it’s time to bring it to life. In this section, we will guide you through the process of lighting the fire pit and testing its functionality. Follow these instructions to ensure a successful and safe ignition of the flames.
Step 1: Gather the Necessary Items
Before you begin, make sure you have the following items within reach:
- Long-handled lighter or matches
- Fire starter cubes or gel fuel
- Tongs for safely handling the fire starter
Step 2: Prepare the Fire Pit
Prior to lighting the fire pit, ensure that the area around it is clear of any flammable materials. Remove any debris or objects that could potentially catch fire. Additionally, check the ventilation openings to ensure proper airflow.
Step 3: Ignite the Flames
To light the fire pit, follow these steps:
- Place a fire starter cube or apply a small amount of gel fuel to the center of the burner.
- Using the long-handled lighter or matches, carefully ignite the fire starter or gel fuel.
- Wait for the flames to catch and spread.
Note: It’s essential to exercise caution when lighting the fire pit to avoid any accidental burns. Keep a safe distance and avoid leaning over the flames.
Step 4: Test the Functionality
After the flames have ignited, test the functionality of the fire pit by observing the following:
Is the flame height appropriate? Adjust the gas flow or flame size control if needed.
Are the flames evenly distributed across the burner? Adjust the arrangement of stones if necessary.
Is there proper ventilation? Ensure that the flame is steady and not affected by wind or lack of airflow.
If you encounter any issues during the testing process, refer back to the previous sections of this guide to troubleshoot and make necessary adjustments.

Now that your table top fire pit is successfully lit and functioning, you can sit back, relax, and enjoy the warm and cozy atmosphere it creates. Remember to always practice fire safety and never leave the fire pit unattended.
Safety Tips and Maintenance
Safety should always be a top priority when using a table top fire pit. Follow these important tips to ensure a safe and enjoyable experience:
- Choose a suitable location: Place your table top fire pit on a stable, non-flammable surface, away from any overhanging trees, structures, or flammable materials.
- Keep a safe distance: Maintain a safe distance between the fire pit and any surrounding furniture or objects. Ensure there is enough space for people to move around comfortably.
- Supervise children and pets: Never leave your table top fire pit unattended when children or pets are present. Keep a close eye on them to prevent accidents or injuries.
- Use proper fuel: Follow the manufacturer’s instructions and only use the recommended fuel for your fire pit. Avoid using flammable liquids or materials as a fuel source.
- Have a fire extinguisher nearby: Keep a fire extinguisher or a bucket of sand nearby in case of emergencies. It’s essential to be prepared to handle unexpected situations.
- Extinguish the fire properly: When you’re done using the fire pit, make sure the flames are completely extinguished before leaving it unattended. Use water or sand to fully put out the fire.
Remember, always prioritize safety to ensure a worry-free experience with your table top fire pit.
In addition to safety precautions, regular maintenance is necessary to keep your fire pit in excellent condition. Here are some maintenance tips:
- Clean regularly: Remove any debris or ashes from the fire pit after each use. Use a brush or a damp cloth to wipe down the surface and keep it clean.
- Inspect for damage: Regularly inspect the fire pit for any signs of damage, such as cracks or loose parts. Address any issues promptly to ensure safe operation.
- Protect from the elements: If your table top fire pit is not weatherproof, cover it or store it indoors when not in use to prevent damage from rain, snow, or extreme temperatures.
By following these safety tips and performing regular maintenance, you can enjoy your table top fire pit for years to come.
Enhancing the Ambiance
Creating a cozy and inviting ambiance around your table top fire pit adds to the overall experience of outdoor gatherings. By incorporating the right elements, you can transform your outdoor space into a warm and welcoming oasis. Here are some creative ideas to enhance the ambiance of your table top fire pit:
1. Decorate the Surrounding Area
Set the stage for a cozy atmosphere by decorating the surrounding area of your table top fire pit. Consider adding string lights, lanterns, or fairy lights to create a soft and enchanting glow. Arrange potted plants or decorative elements that complement your outdoor space’s aesthetic, such as candles, wind chimes, or rustic lanterns.
2. Choose Suitable Seating
Comfortable seating plays a vital role in creating a cozy ambiance. Opt for weather-resistant outdoor furniture that provides both comfort and style. Consider adding cushions, throws, or blankets for an extra layer of warmth and coziness. Arrange the seating in a way that encourages conversation and connection.
3. Create a Relaxing Atmosphere
Utilize soothing and relaxing elements to create a tranquil atmosphere around your table top fire pit. Incorporate natural elements like water features, such as a small fountain or a tabletop water feature. The sound of flowing water can promote relaxation and help create a spa-like ambiance. Additionally, consider playing soft music or nature sounds to further enhance the calming atmosphere.
4. Set the Mood with Scents
Delight your senses by infusing the air with pleasant scents. Use scented candles, essential oil diffusers, or incense to create an inviting aroma. Opt for scents that evoke relaxation and tranquility, such as lavender, vanilla, or cedarwood. These scents can help create a warm and inviting ambiance.
5. Incorporate Natural Elements
Integrate natural elements into your table top fire pit design to create a harmonious and serene ambiance. Use pebbles, rocks, or decorative stones to enhance the visual appeal of the fire pit. Arrange driftwood or natural branches nearby for a rustic touch. These natural elements not only add beauty but also connect your fire pit to the surrounding environment.
6. Considerations for Safety
While enhancing the ambiance, it’s important to prioritize safety. Keep flammable materials away from the fire pit and ensure there is ample space between seating and the flames. Place a fire extinguisher nearby and familiarize yourself with fire safety protocols. By implementing safety measures, you can enjoy the warm and inviting atmosphere without compromising anyone’s well-being.
By applying these creative ideas, you can transform your table top fire pit into a captivating focal point in your outdoor space. Enjoy the cozy atmosphere and make lasting memories with friends and family.
Troubleshooting Common Issues
Sometimes, even with careful planning and execution, you may encounter common issues with your table top fire pit. Don’t worry, we’re here to help! In this section, we will address these problems and offer troubleshooting tips to help you overcome them.
1. Burner Not Igniting
One of the most common issues is when the burner fails to ignite. This can be caused by several factors:
- Gas supply issues: Ensure that the gas supply valve is fully open and that there are no blockages in the gas line.
- Igniter malfunction: Check the igniter for any loose connections or signs of damage. Replace it if necessary.
- Clogged burner holes: Clean the burner holes using a small wire brush to remove any debris or residue that may be blocking the gas flow.
2. Poor Flame Quality
If you’re experiencing a weak or inconsistent flame, try the following troubleshooting steps:
- Gas pressure issues: Make sure the gas pressure is set correctly according to the manufacturer’s instructions.
- Gas line restrictions: Check for any kinks or obstructions in the gas line that may be impeding the flow of gas.
- Dirty burner: Clean the burner thoroughly to remove any dirt or buildup that may be affecting the flame quality.
3. Gas Smell
If you detect a strong gas smell near your table top fire pit, it’s crucial to address the issue immediately:
Turn off the gas supply: Shut off the gas supply valve right away to prevent any potential hazards.
Check for leaks: Use a mixture of soapy water to detect any gas leaks. Apply the soapy water to the connections and hoses, and if you notice bubbles forming, there is a leak.
Repair or replace: If you discover a gas leak, it’s best to consult a professional for repairs or replacement of faulty components.
4. Excessive Heat
If your table top fire pit generates excessive heat, follow these troubleshooting steps:
- Check clearance: Ensure that your fire pit has proper clearance from flammable materials, such as furniture, curtains, or overhanging structures.
- Adjust burner size: If the flame is too large, reducing the size of the burner or adjusting the gas flow can help control the heat output.
- Proper ventilation: Ensure that the area around the fire pit is well-ventilated to prevent heat buildup.
Remember, if you’re unsure about troubleshooting or encounter more complex issues, it’s always wise to consult a qualified professional for assistance. Now that you’re equipped with troubleshooting tips, you’ll be able to troubleshoot common issues with your table top fire pit like a pro!
| Issue | Troubleshooting Tips |
|---|---|
| Burner Not Igniting | 1. Check gas supply and connections 2. Inspect and clean igniter 3. Clean burner holes |
| Poor Flame Quality | 1. Verify gas pressure 2. Remove gas line restrictions 3. Clean burner |
| Gas Smell | 1. Turn off gas supply 2. Check for leaks with soapy water 3. Repair or replace faulty components |
| Excessive Heat | 1. Check clearance 2. Adjust burner size 3. Ensure proper ventilation |
Conclusion
In conclusion, creating a table top fire pit is a fun and rewarding DIY project that can transform your outdoor space. By following our step-by-step guide, you can easily make your own beautiful fire pit and enjoy its warmth and ambiance.
With a few simple materials and tools, you’ll be able to create a custom table top fire pit that fits your style and preferences. Whether you choose to use gas or another fuel source, our instructions will ensure a safe and functional fire pit.
Imagine cozy evenings spent gathered around the fire pit with your loved ones, enjoying the crackling flames and creating lasting memories. With our guide, you’ll have everything you need to bring this inviting feature to your outdoor gatherings.
So, what are you waiting for? Follow our DIY guide and get started on making your own table top fire pit today. Get ready to enhance your outdoor experience and create a warm and inviting atmosphere for all to enjoy.