


Welcome to our comprehensive guide on how to clean and maintain your Solo Stove. In this section, we will provide you with valuable tips and tricks to make the cleaning process effortless and keep your stove in top shape.
Regular cleaning and maintenance of your Solo Stove are essential to ensure its optimal performance and longevity. By following the tips and techniques shared in this guide, you can keep your stove clean and ready for your outdoor cooking adventures.
Whether you are a seasoned camper or new to using Solo Stoves, learning how to clean your stove properly is crucial. Not only will it improve the efficiency of your stove, but it will also enhance your overall cooking experience.
Throughout this guide, we will cover the best practices for cleaning your Solo Stove, step-by-step instructions, maintenance tips, and even provide you with a handy checklist to keep track of your cleaning routine.
So, if you are ready to learn how to clean your Solo Stove like a pro, let’s dive in and discover the secrets to effortless stove cleaning and maintenance.
Key Takeaways:
- Regular cleaning and maintenance are crucial for the optimal performance and longevity of your Solo Stove.
- Follow the step-by-step guide provided in this article to clean your Solo Stove effectively.
- Implement the maintenance tips shared to prevent rust and ensure the longevity of your stove.
- Use the provided cleaning checklist to stay organized and cover all necessary cleaning tasks.
- By prioritizing cleaning and maintenance, you can enjoy a seamless outdoor cooking experience with your Solo Stove.
Why Cleaning Your Solo Stove is Important
Regularly cleaning your Solo Stove is essential to ensure optimal performance, longevity, and safety. By following the best practices for cleaning, you can maintain a clean and efficient stove that will enhance your outdoor cooking experience.
When you use your Solo Stove, it generates soot, ash, and other debris that can accumulate over time. This buildup can hinder the airflow, affecting the stove’s performance and efficiency. Additionally, neglecting to clean your stove can lead to rust and corrosion, which can further compromise its functionality.
To avoid these issues and enjoy worry-free cooking, it’s crucial to incorporate solo stove care and cleaning into your routine maintenance. By dedicating a few simple steps to clean your stove after each use, you can ensure its longevity and keep it in top shape.
Best Practices for Cleaning Solo Stove
Follow these best practices to clean your Solo Stove effectively:
- Allow the stove to cool down completely: Before cleaning your Solo Stove, ensure that it has cooled down entirely to avoid the risk of burns.
- Remove any loose debris: Before wiping down the stove, remove any loose ash, leaves, or other debris that may have accumulated inside or on the stove.
- Use a non-abrasive scrub brush or sponge: Scrub the interior and exterior surfaces of the stove gently with a non-abrasive brush or sponge. Avoid using harsh chemicals or abrasive cleaners that could damage the stove’s finish.
- Rinse and dry: Rinse off any remaining soapy residue and dry the stove thoroughly with a clean cloth. This step is particularly crucial to prevent rust and corrosion.
- Store in a dry place: After cleaning, store your Solo Stove in a dry place to prevent moisture buildup, which can lead to rust and other issues.
Cleaning your Solo Stove regularly and following these best practices will not only enhance its performance and longevity but also ensure a safe and enjoyable outdoor cooking experience. Now that you understand why cleaning your Solo Stove is important, let’s dive into a step-by-step guide on how to clean your stove effectively.
| Benefits of Regular Cleaning | Risks of Neglecting Cleaning |
|---|---|
| 1. Improved airflow and performance | 1. Impaired functionality and efficiency |
| 2. Enhanced safety | 2. Potential for rust and corrosion |
| 3. Prolonged stove lifespan | 3. Difficulty in starting the fire |
| 4. Prevention of rust and corrosion | 4. Increased risk of malfunctions |
Step-by-Step Guide for Cleaning Your Solo Stove
Cleaning your Solo Stove doesn’t have to be a daunting task. With our easy-to-follow step-by-step guide, you can keep your stove clean and functioning optimally. Follow these simple instructions to remove soot, ash, and other debris, ensuring your Solo Stove is always ready for your outdoor adventures.
Step 1: Gather the Necessary Supplies
Before you start cleaning your Solo Stove, make sure you have the following supplies handy:
- A soft-bristle brush
- A small scoop or brush for removing ash
- Mild dish soap
- A sponge or cloth
- Water
Once you have all the supplies ready, you’re good to go.
Step 2: Empty the Stove and Remove Any Loose Debris
Start by emptying the stove of any leftover firewood, ash, and other debris. You can use a small scoop or brush to remove the ash from the stove. Be careful not to inhale the ash particles.
Step 3: Brush the Interior and Exterior of the Stove
Using a soft-bristle brush, gently scrub the interior and exterior surfaces of the stove to remove any soot or stubborn residue. Pay close attention to the areas near the air vents and the burner. This will help improve the stove’s performance and prevent clogs.
Step 4: Clean the Stove with Mild Dish Soap
Mix a small amount of mild dish soap with water to create a soapy solution. Dip a sponge or cloth into the solution and wipe down the interior and exterior of the stove. This will help remove any remaining grease or stains. Rinse the stove thoroughly with clean water afterwards.
Step 5: Dry and Reassemble the Stove
Ensure that the stove is completely dry before reassembling it. Wipe down all the parts with a dry cloth and allow them to air dry for a while. Once dry, carefully reassemble the stove according to the manufacturer’s instructions.
That’s it! Following these easy steps will leave your Solo Stove clean and ready for your next outdoor adventure.
Essential Maintenance Tips for Your Solo Stove
Proper maintenance is crucial for keeping your Solo Stove in optimal condition and ensuring its longevity. By following these top tips, you can prevent rust and enhance the performance of your stove.
1. Regular Cleaning
Make it a habit to clean your Solo Stove after each use. Remove any leftover ash, debris, or residue from the burn chamber, ash pan, and the surrounding areas. This prevents buildup and maintains efficient airflow.
2. Protect from the Elements
When your Solo Stove is not in use, store it in a dry and covered area. Exposure to rain, snow, and extreme weather conditions can accelerate rusting and damage the stove. Invest in a protective cover or find a suitable storage solution to shield your stove from the elements.
3. Handle with Care
Handle your Solo Stove with care to avoid unnecessary strain or damage. When moving or transporting the stove, use the provided handles or accessories to prevent accidents. Avoid placing heavy objects on top of the stove that can dent or deform the surface.
4. Use High-Quality Fuel
Using dry and high-quality fuel is essential for the optimal performance of your Solo Stove. Avoid using wet or damp wood, as it can create excess smoke and cause a buildup of creosote in the burn chamber. Opt for seasoned hardwood or Solo Stove’s recommended fuel sources.
5. Inspect and Replace Parts
Regularly inspect your Solo Stove for any signs of wear or damage. Check the hinges, handles, and other components for loose screws or malfunctioning parts. If necessary, replace worn-out or broken parts to maintain the stove’s functionality and safety.

6. Avoid Harsh Cleaning Agents
When cleaning your Solo Stove, avoid using harsh chemicals or abrasive cleaning agents. Instead, opt for mild dish soap, warm water, and a soft brush or cloth. Gently scrub the surfaces to remove stubborn residues without causing damage.
| Tips | Benefits |
|---|---|
| Clean after each use | Prevents buildup and ensures efficient airflow |
| Protect from the elements | Prevents rust and damage |
| Handle with care | Avoids strain and damage |
| Use high-quality fuel | Optimal performance and minimal smoke |
| Inspect and replace parts | Maintains functionality and safety |
| Avoid harsh cleaning agents | Gentle and effective cleaning |
7. Seek Professional Help if Needed
If you encounter any significant issues with your Solo Stove or are unsure about any maintenance tasks, seek assistance from the manufacturer or a professional. They can provide expert guidance and ensure that your stove remains in excellent condition.
By following these essential maintenance tips, you can enjoy your Solo Stove for years to come, creating memorable outdoor experiences with family and friends. Keep your stove clean, protected, and well-maintained to optimize its performance and extend its lifespan.
Cleaning Checklist for Your Solo Stove
To effectively clean and maintain your Solo Stove, follow this comprehensive checklist that covers all the necessary tasks. By incorporating these cleaning and maintenance practices into your routine, you can ensure that your stove remains clean, efficient, and ready to use.
- Wait for the stove to cool down: Before starting the cleaning process, make sure your Solo Stove has completely cooled down. This will prevent any accidental burns or injuries.
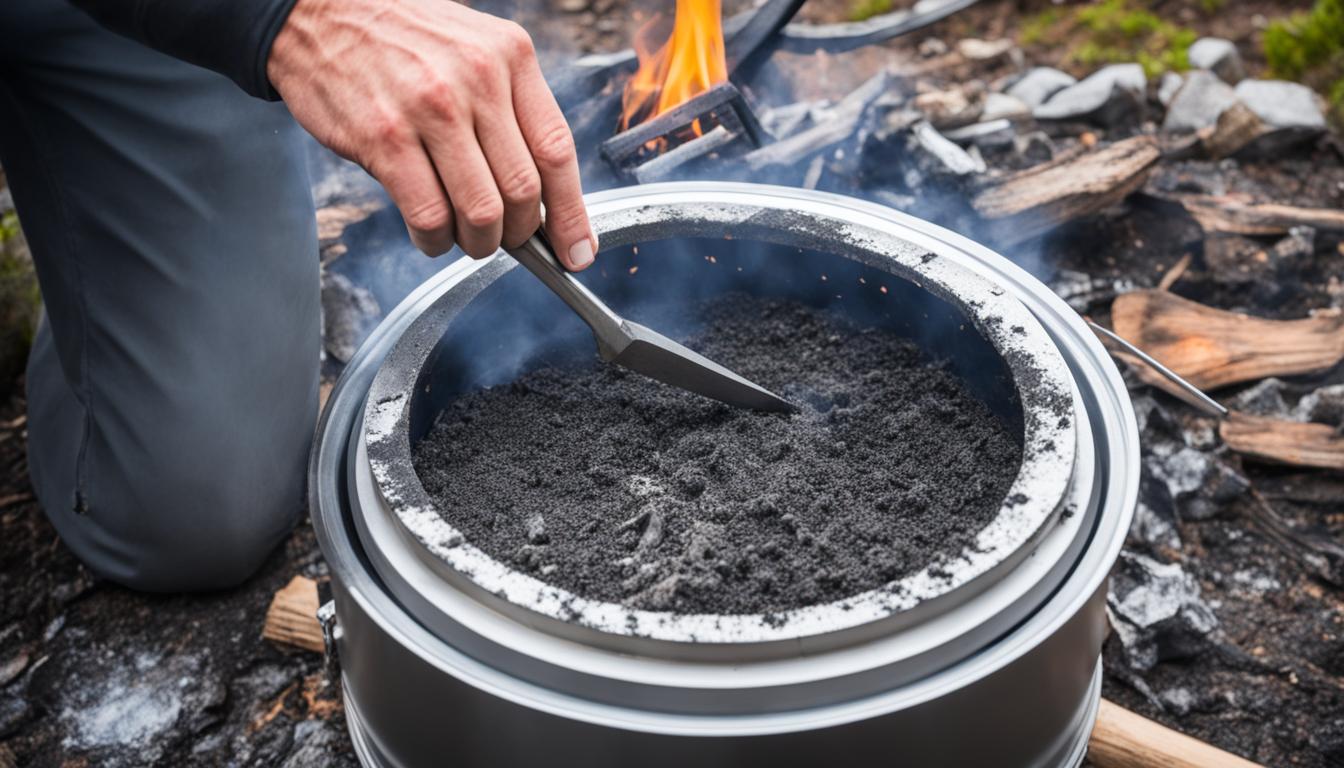
- Remove ashes and debris: Use a suitable tool, such as a shovel or brush, to gently remove the ashes and debris from the burn chamber. Dispose of them properly.
- Clean the burn chamber: Use a soft cloth or sponge dampened with warm water and mild soap to clean the inside of the burn chamber. Avoid using abrasive cleaners or harsh chemicals, as they can damage the stove.
- Clean the exterior: Wipe down the exterior surfaces of your Solo Stove using a soft cloth and soapy water. Be sure to remove any dirt, grease, or stains. Rinse with clean water and dry thoroughly.
- Inspect the gaskets: Check the condition of the gaskets that provide a seal between the stove’s components. If they are worn or damaged, replace them following the manufacturer’s instructions.
- Check for rust: Inspect the stove for any signs of rust. If you spot any rust, gently scrub the affected area with a wire brush or fine-grit sandpaper. Apply a high-temperature paint or stove polish to prevent further rusting.
- Ensure proper ventilation: Clean the air vents and ensure they are free from obstructions. This will ensure optimal airflow and efficient burning.
- Store properly: When not in use, store your Solo Stove in a dry and protected area. If possible, cover it with a weather-resistant cover to prevent dust, dirt, and moisture accumulation.
By following this cleaning checklist regularly, you can maximize the lifespan of your Solo Stove and enjoy hassle-free outdoor cooking adventures.
Conclusion
In conclusion, maintaining and cleaning your Solo Stove is crucial for its optimal performance and long lifespan. By following the tips and tricks provided in this guide, you can effortlessly keep your stove in top shape, ensuring a great outdoor cooking experience every time.
Regular cleaning is essential to remove soot, ash, and debris that may affect the stove’s efficiency. Additionally, proper maintenance techniques like preventing rust and ensuring regular inspections will further enhance your Solo Stove’s performance.
Remember to make use of our step-by-step cleaning guide and helpful checklist to keep track of the necessary tasks. By prioritizing routine cleaning and maintenance, you can maximize the lifespan of your Solo Stove and enjoy many memorable outdoor cooking moments.
How much did you like Our detailed Blog”? Review Also, please share these Blogs with your friends on social media.
Recommended